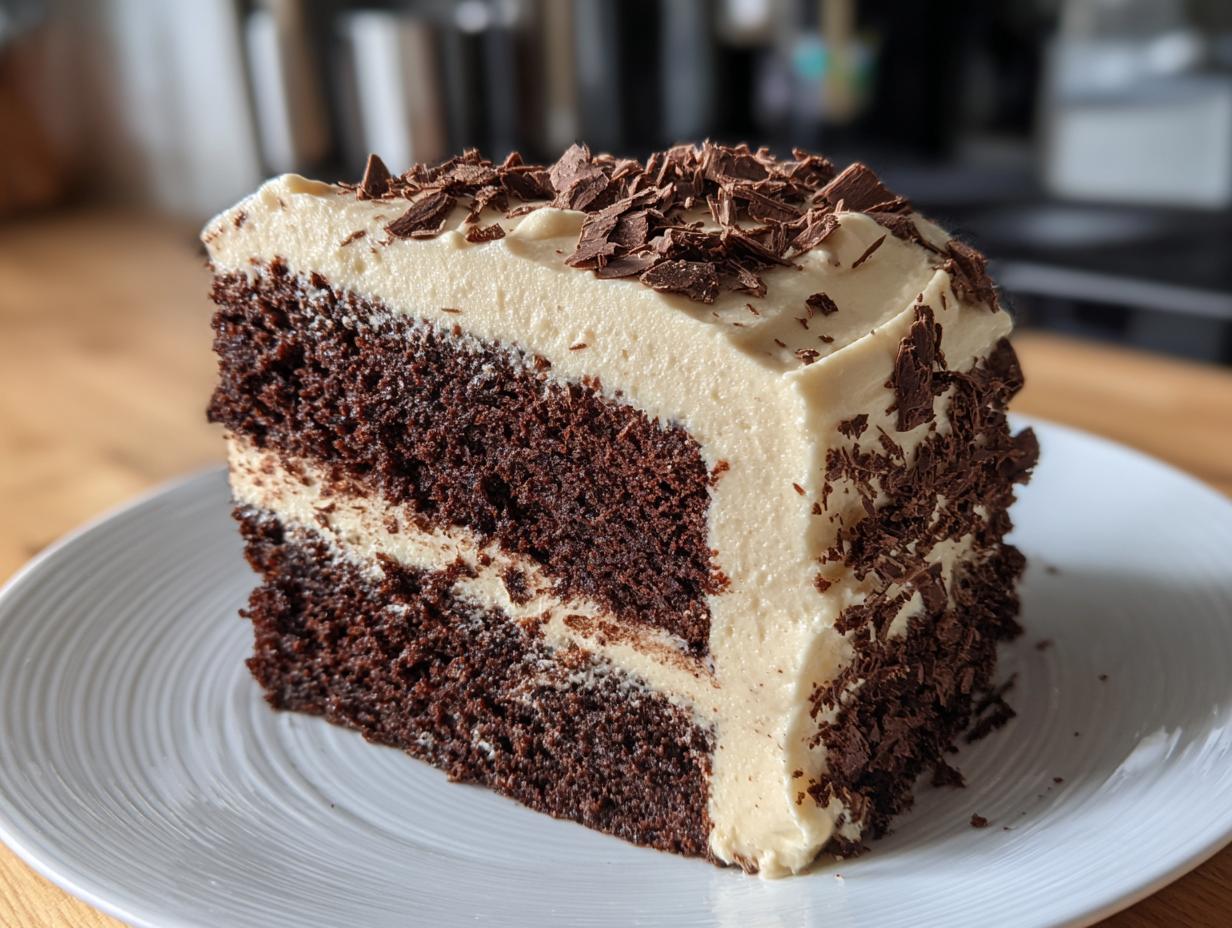
Oh, chocolate. Where do I even begin? That rich, dark, melt-in-your-mouth goodness? It’s like a hug in a dessert, isn’t it? And these Chocolate Lava Cakes? Well, let me tell you, they’re the embodiment of chocolatey perfection! The best part? They’re ridiculously easy. Seriously, you can whip them up in under thirty minutes, and trust me, they’ll impress your friends, your family, or even just you (no judgment here!).
I remember the first time I made these. It was a Valentine’s Day disaster – a romantic dinner that almost completely went sideways. But, hey, at least the lava cakes were a HUGE success. From that moment on, they became my go-to dessert for any occasion calling for something special (or as a pick-me-up on a Tuesday!). They are easy to make, decadent, and perfect for any occasion! Now, I’m excited to share my go-to recipe with you!
Why You’ll Love These *Chocolate Lava Cakes*
Okay, friends, let me tell you why you *absolutely* need these in your life. First off, they’re super easy! Seriously, no fancy skills required. Next, that warm, gooey chocolate center? Pure bliss. And honestly, they look so fancy-pants, everyone will think you’re a baking genius!
- Easy Peasy: Minimal effort for maximum deliciousness.
- Gooey Goodness: That molten chocolate center is to die for.
- Impressive Presentation: Looks like you ordered it from a fancy restaurant!
- Date Night Delight: Perfect for a romantic evening at home.
- Customizable: Add your favorite toppings for a personal touch.
Ingredients You’ll Need for Perfect *Chocolate Lava Cakes*
Alright, let’s get down to business! You don’t need a ton of stuff, promise. Here’s what you’ll need to make these amazing Chocolate Lava Cakes. Simple and straightforward!
- 6 ounces semi-sweet chocolate, chopped: Okay, quality matters here.
- 1/2 cup (1 stick) unsalted butter: Always unsalted!
- 2 large eggs: Gotta have ’em!
- 2 large egg yolks: Adds extra richness (you won’t regret it!).
- 1/4 cup granulated sugar: Sweetness is key!
- 2 tablespoons all-purpose flour: Just a little to hold it together.
- Pinch of salt: Don’t skip it, it balances the sweetness!
- Powdered sugar, for dusting (optional): For a pretty finish.
- Fresh berries, for serving (optional): Because, why not?
Ingredient Spotlight: Choosing the Right Chocolate
Okay, this is where we get serious, chocolate lovers! The key to a truly outstanding Chocolate Lava Cake? The chocolate, baby! Yes, you’ve got to use the good stuff. Trust me, it makes all the difference. I’m talking about good, quality chocolate bars—not the chips.
You can use semi-sweet, which is my usual go-to…or even dark chocolate, if you’re feeling adventurous (and like a slightly less sweet cake!). Experiment a little – see what you like most! My top tip? Look for chocolate with a high cocoa percentage (at least 55% for semi-sweet). It’ll give your lava cakes a richer, deeper flavor. You won’t regret it!
How to Make Delicious *Chocolate Lava Cakes* Step-by-Step
Alright, let’s get baking! Don’t you worry, it’s easier than you think, and the results…well, they’re pure magic. Just follow these simple steps, and you’ll be devouring warm, gooey Chocolate Lava Cakes in no time. Ready? Let’s go!
Preparing the Ramekins
First things first, we gotta prep those ramekins! This is super important or your beautiful cakes will stick and nobody wants that! Lightly grease two ramekins (about 6-8 ounce size) with butter. Then, sprinkle a little flour in each one, coating the insides. Tap out the excess flour. This will ensure they come out perfectly!
Melting the Chocolate and Butter
Next up, melt the chocolate and butter. You can do this in a double boiler over simmering water (careful, it splatters!) or, and this is my fave because it’s quicker, in the microwave. Microwave the chocolate and butter in a heat-safe bowl in 30-second intervals, stirring in between, until smooth. Be careful not to overheat it, or the chocolate might seize up on you!
Whisking the Eggs and Sugar
In a separate bowl, it’s time to whisk the eggs and granulated sugar. Whisk it until it’s pale and a little bit thickened–you’ll see the color change slightly. This step adds a bit of air, and it’s key for a great texture. Don’t overdo it, just a minute or two is all you need!
Combining the Ingredients
Now, gently pour the melted chocolate mixture into the egg mixture. Then, whisk until just combined. Next, in go the flour and salt. *Gently* fold them in until *just* combined. Don’t overmix! Overmixing will develop the gluten and we do not want that. The batter should look oh-so-smooth and ready to bake!
Baking the *Chocolate Lava Cakes*
Now, pour the batter into those prepared ramekins –divide it evenly, of course! Pop ’em in a preheated oven at 425°F (220°C) for 12-15 minutes. Here’s the tricky part (but you got this!): The edges should be set, but the center should still be soft and gooey. I usually do the “wiggle test” – gently shake the ramekin. If the middle jiggles, you’re golden!
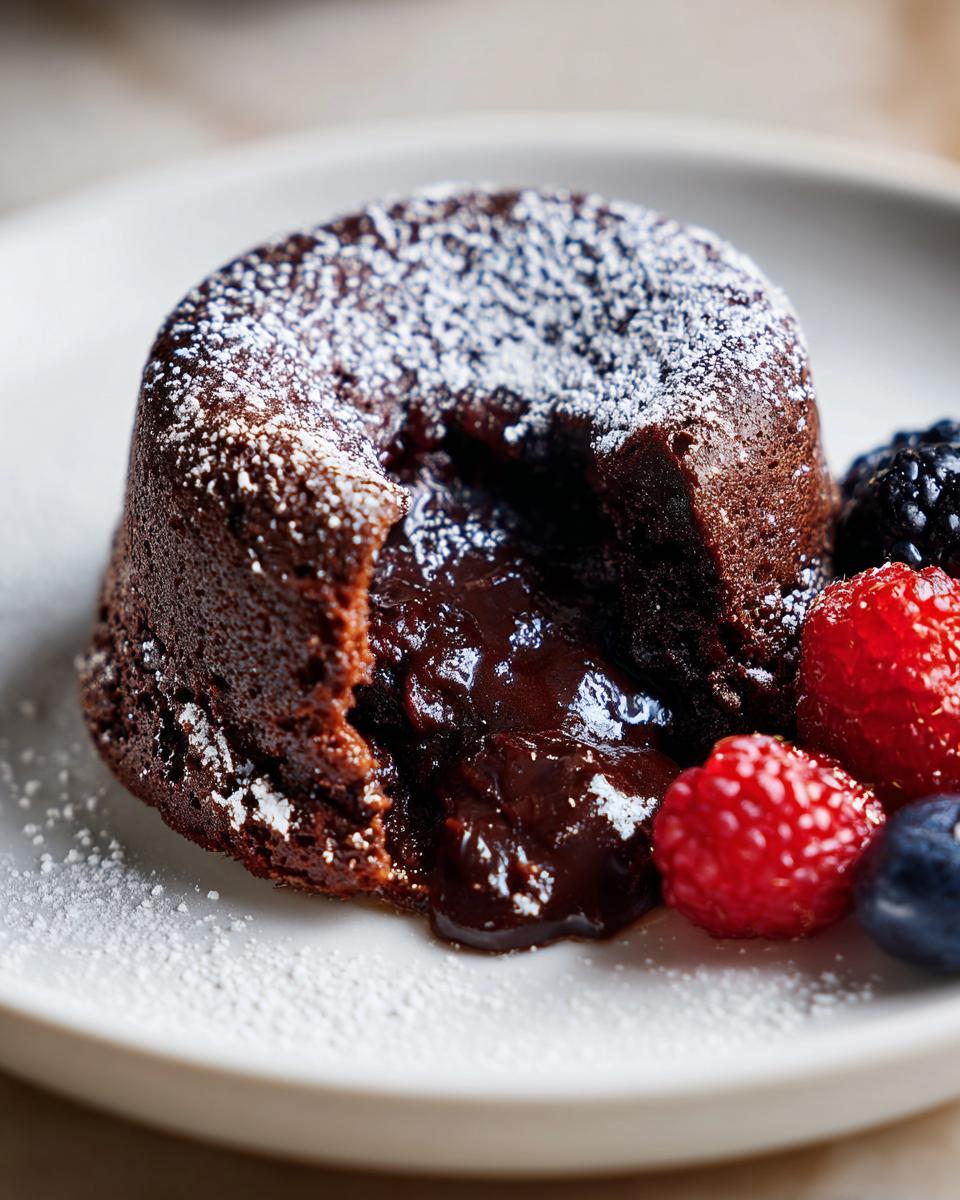
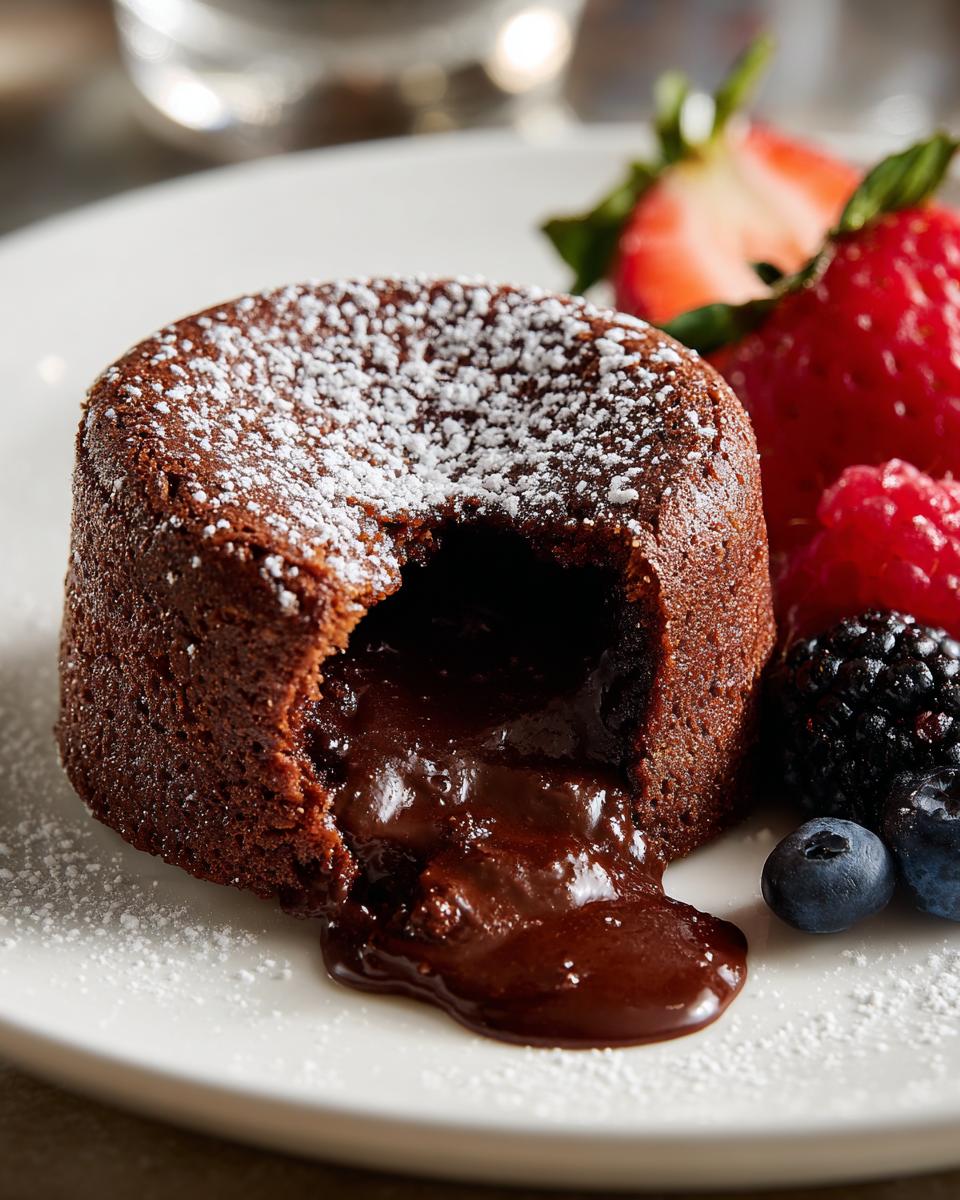
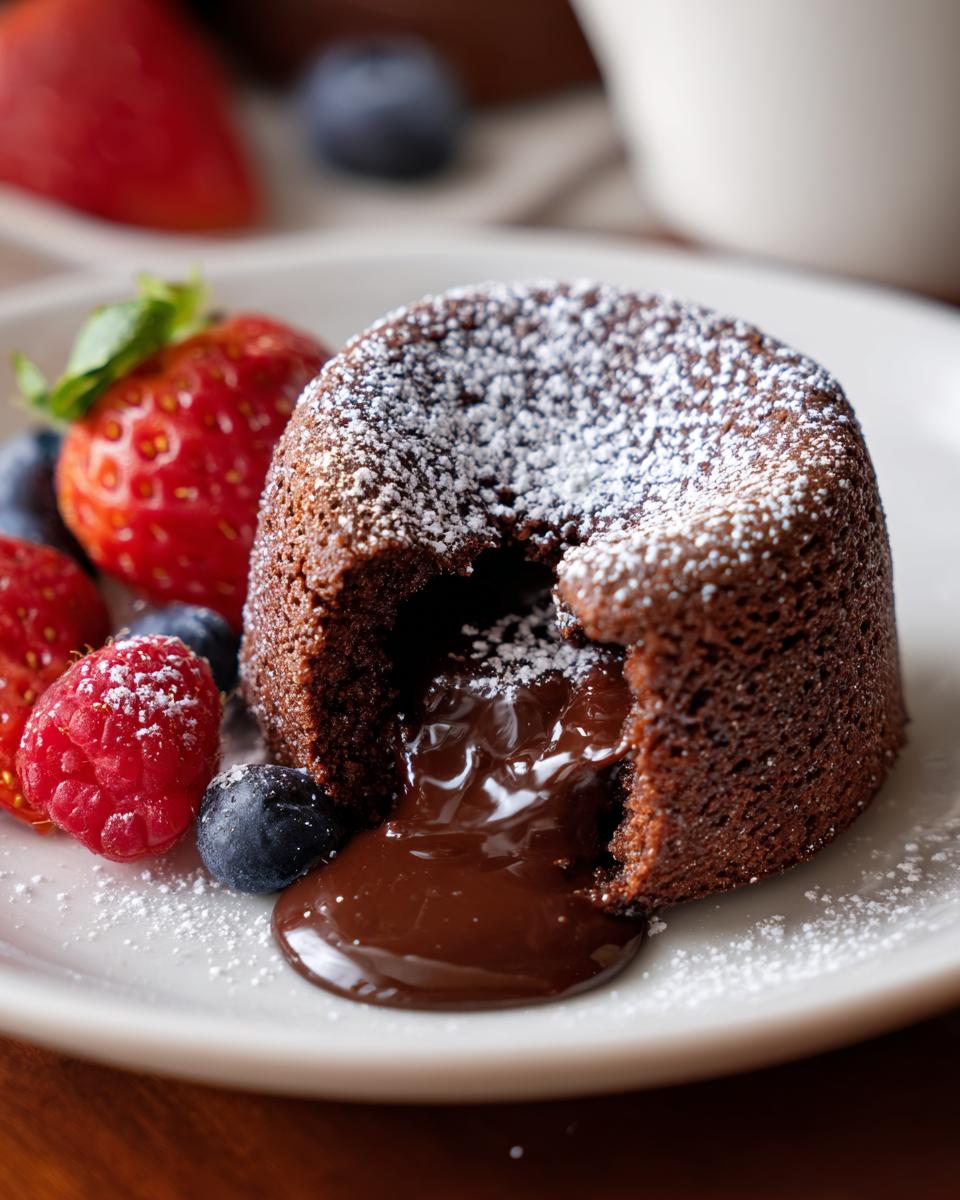
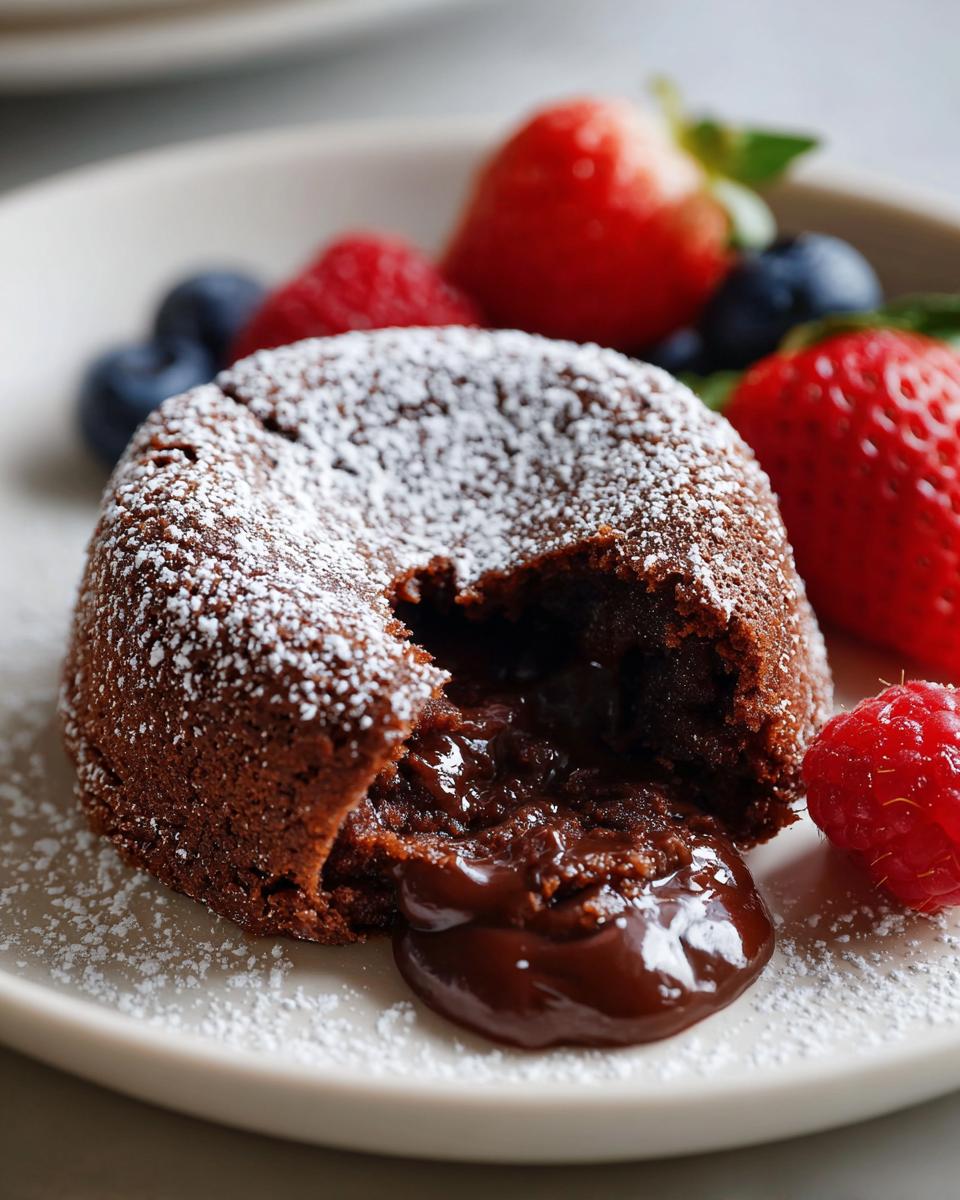
Serving Your *Chocolate Lava Cakes*
Let those beauties cool for a minute or two. Then, carefully invert the cakes onto plates. If they don’t slide out easily, run a knife around the edges. Dust with powdered sugar (because, why not?), and serve immediately. I like to dress them up with fresh berries –it’s the perfect combo!
Tips for Success: Achieving the Perfect *Chocolate Lava Cake*
Alright, friends, let’s talk about getting those Chocolate Lava Cakes *just right*. Nobody wants a cake that’s stuck to the ramekin, or worse, completely overbaked. First off, get yourself an oven thermometer – ovens can be sneaky! Making sure your oven is actually at the right temperature is key.
Next, keep a close eye on those precious cakes. Seriously, baking times can vary, so the “wiggle test” is your best friend. A slight wobble in the center? Perfection! And, if you’re worried about them sticking, really, really grease and flour those ramekins like your life depends on it! Or, honestly, you can cheat and use those silicone ramekins. Whatever makes your life easier, right? They make this so much easier!
Variations on *Chocolate Lava Cakes*
Okay, so you’ve mastered the classic Chocolate Lava Cakes? Awesome! But, hey, baking is all about having fun, right? Wanna get a little wild and crazy? I got you. Here’s a few ideas to shake things up.
Try adding a pinch of espresso powder to the batter for a mocha twist (yum!). Or, how about a swirl of peanut butter in the center? For something extra, throw in some fresh raspberries when you serve it. See? The possibilities are endless! Just have fun and create something that is *yours*!
Serving Suggestions for Your *Chocolate Lava Cakes*
So, you’ve got these gorgeous, gooey Chocolate Lava Cakes, right? Okay, what now? Well, my favorite part is deciding what to serve them *with*! A scoop of vanilla ice cream is a classic, can’t go wrong, and it’s a perfect combo with the warm chocolate. Whipped cream is another winner, especially if you have a can of it.
Fresh berries are beautiful (and delicious!). Raspberries, strawberries, or even a mixed berry medley. Whatever you have on hand! Honestly? They’re amazing all on their own. But, let’s be honest, toppings make everything better.
Make-Ahead & Storage Tips for *Chocolate Lava Cakes*
Okay, so real life calls, and you can’t always bake these beauties right when the craving hits, right? No problem! The batter for these Chocolate Lava Cakes can be made a few hours in advance. Just cover the ramekins with plastic wrap and keep them in the fridge. That way you can have them ready to bake at a later time!
I don’t recommend baking them ahead, ’cause that molten center is the *whole* point! Leftovers? (Ha! Like there *are* leftovers!). No, just kidding. If by some miracle there are, store them in the fridge and reheat them in the oven or microwave, but be warned, the lava effect will be less pronounced. Reheating will still deliver deliciousness, just not the gooey goodness!
Frequently Asked Questions About *Chocolate Lava Cakes*
Alright, so you’ve made these *Chocolate Lava Cakes*, and suddenly you’re the star baker of the family. Awesome! But, I know you probably have some questions. Don’t worry, I got you covered, I’ve heard them all! Let’s clear up a few things, shall we?
Can I make these ahead of time?
Yes, darling, you absolutely can! In fact, it makes life a whole lot easier! You can prep the batter ahead of time and store the filled ramekins (covered, naturally) in the fridge for a few hours. Just pop them in the oven when you’re ready to create the magic and bake ‘em!
How do I know when they’re done?
Here’s the thing: It’s the jiggle, baby! The edges should be set, but the center should still be soft and, well, *lava-like*. I usually give the ramekin a little wiggle. If the middle has a slight wobble, you’re good to go! A toothpick test might give you more cake than molten, so watch closely.
Can I use different types of chocolate?
Absolutely! Feel free to experiment! Semi-sweet is classic and foolproof. I also love using dark chocolate for a richer taste (go for 70% cocoa if you’re feeling adventurous!). Milk chocolate is another option, but I find it makes it a bit sweeter. Play around, find your fave!
How do I store leftover *Chocolate Lava Cakes*?
Leftovers? Ha! That’s a good one! But okay, if by some miracle you *do* have leftovers (teach me your ways!), store those Chocolate Lava Cakes in the fridge. Reheat them gently in the oven or microwave, but be warned: the lava center will probably be a little less… molten. Still delicious, though!
Nutritional Information for *Chocolate Lava Cakes*
Alright, folks, just a quick heads-up! The nutritional info here is just an estimate. It can vary a bit depending on the brands of chocolate and other ingredients you use, and how big those glorious lava cakes of yours end up, so don’t be *too* strict!
Print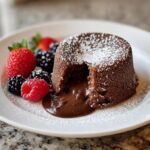
Chocolate Lava Cakes
- Total Time: 27-30 min
- Yield: 2 servings
- Diet: Vegetarian
Description
Simple recipe for delicious chocolate lava cakes.
Ingredients
- 6 ounces semi-sweet chocolate, chopped
- 1/2 cup (1 stick) unsalted butter
- 2 large eggs
- 2 large egg yolks
- 1/4 cup granulated sugar
- 2 tablespoons all-purpose flour
- Pinch of salt
- Powdered sugar, for dusting (optional)
- Fresh berries, for serving (optional)
Instructions
- Preheat your oven to 425°F (220°C). Grease and flour two ramekins.
- In a heatproof bowl set over a pan of simmering water, melt the chocolate and butter, stirring until smooth. Remove from heat.
- In a separate bowl, whisk together the eggs, egg yolks, and sugar until pale and slightly thickened.
- Whisk the melted chocolate mixture into the egg mixture until combined.
- Gently fold in the flour and salt until just combined. Do not overmix.
- Pour the batter into the prepared ramekins.
- Bake for 12-15 minutes, or until the edges are set and the center is still soft.
- Let cool for a minute or two before inverting onto plates.
- Dust with powdered sugar and serve immediately with fresh berries, if desired.
Notes
- You can make these ahead of time and bake them just before serving.
- For best results, use good quality chocolate.
- Prep Time: 15 min
- Cook Time: 12-15 min
- Category: Dessert
- Method: Baking
- Cuisine: American