Oh my goodness, making homemade dog treats is such a joy! Seriously, watching my pup, Buster, get all excited over something I baked myself? It’s the best! And let me tell you, these Beef & Cheddar Training Treats are a total game-changer. They’re seriously delicious (according to Buster, at least!), super easy to whip up, and perfect for training. They’re way better than store-bought treats in my book.
I’ve been making these for Buster for ages, and they’re his absolute favorite. They’re soft enough to break into small pieces, which is awesome when you’re working on commands. Plus, I know exactly what’s going into them, so I feel good about rewarding him. Trust me, once you make these, you’ll be hooked! Let’s get baking!
Why Make Your Own Beef & Cheddar Training Treats?
Okay, so listen, making your own dog treats is a total win-win! You’re in charge of *everything* that goes into them. That means no mystery ingredients or weird preservatives. Plus, it’s way kinder to your wallet. Honestly, store-bought treats can get pricey!
But the real magic of these Beef & Cheddar Training Treats? They’re pure doggy catnip! The beef and cheddar combo is irresistible, at least to my furry friend. Also, these are super easy to break into smaller pieces. Perfect for quick rewards during training sessions, which is super important. That means happier pups, and easier training. Trust me! You’ll love them, and so will your pal.
Ingredients You’ll Need for These Beef & Cheddar Training Treats
Alright, let’s talk ingredients! You won’t believe how simple these treats are to make. Here’s what you’ll need, and trust me, it’s all stuff you probably already have at home (or can easily find at your local store!).
- 1 pound ground beef (I usually go for 80/20, but whatever you prefer is fine!)
- 1 cup shredded cheddar cheese (Sharp or mild cheddar? Totally up to you! Buster loves sharp, but you do you.)
- 1 large egg (helps bind everything together!)
- 1/2 cup all-purpose flour (You can swap this for whole wheat flour if your pup has any sensitivities, too!)
That’s it! Easy peasy, right? I usually get my ground beef from the butcher, but the grocery store stuff works perfectly fine too. Let’s get mixing!
Step-by-Step Instructions: Making the Beef & Cheddar Training Treats
Okay, friends, let’s get down to the nitty-gritty and make these yummy Beef & Cheddar Training Treats! It’s seriously so simple, even if you’re not a pro baker. Just follow these steps, and you’ll be the hero of your dog’s day in no time. I’ve made these treats dozens of times, so I’ll walk you through it. Don’t worry, you’ve totally got this. Let’s get started!
Prepping the Dough
First things first, let’s get that dough ready. Grab your mixing bowl and toss in that pound of ground beef. Next, add the shredded cheddar cheese and crack in your egg. I usually give it a quick mix with a fork to break up the yolk, no one wants a whole egg in a ball of meat! Now, get your hands in there and really mix it all together. Once it’s all combined nicely, slowly add in the flour. Mix it until a nice, workable dough forms. If it’s too sticky, just add a tiny bit more flour, a tablespoon at a time. Careful, it can get sticky fast! But don’t worry, the perfect treat is on the way!
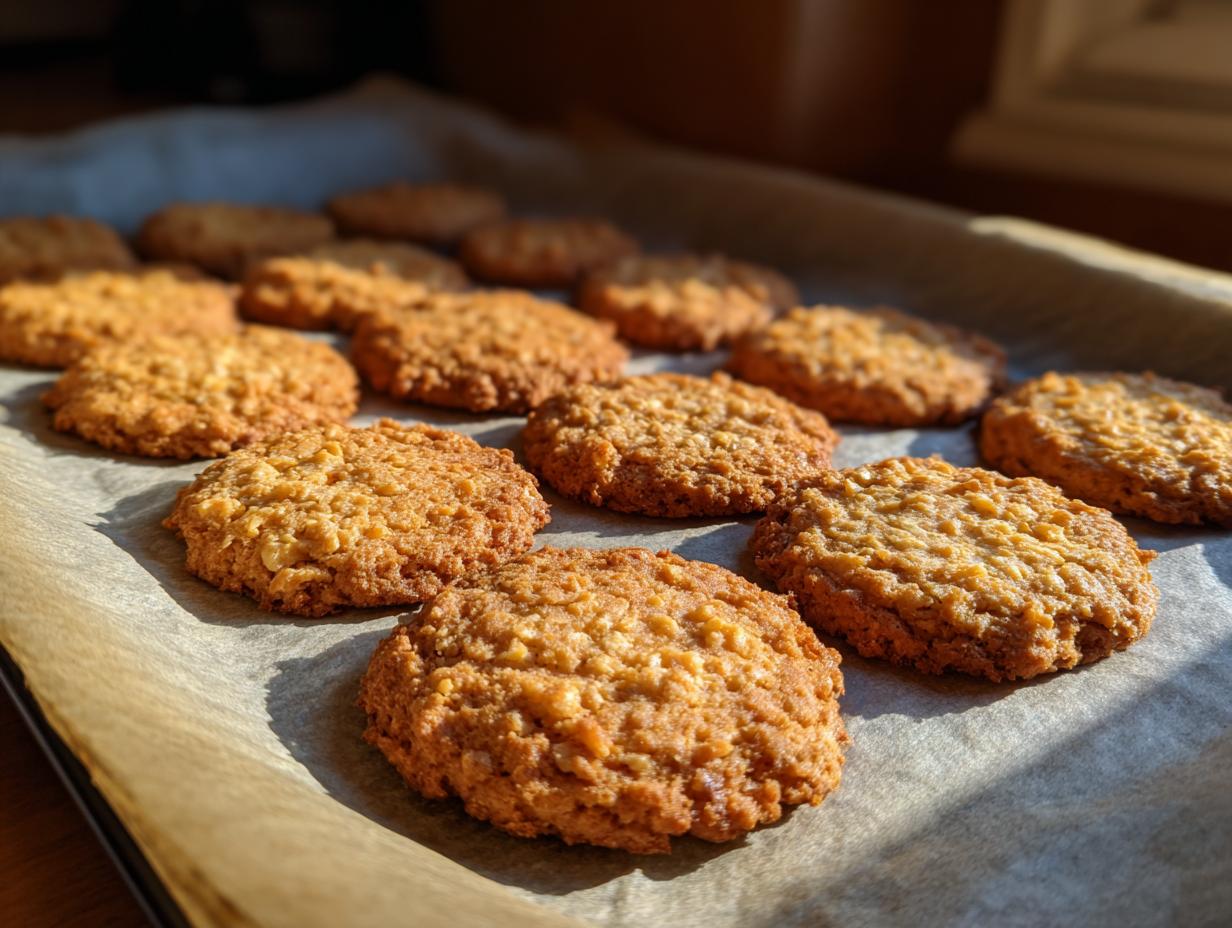
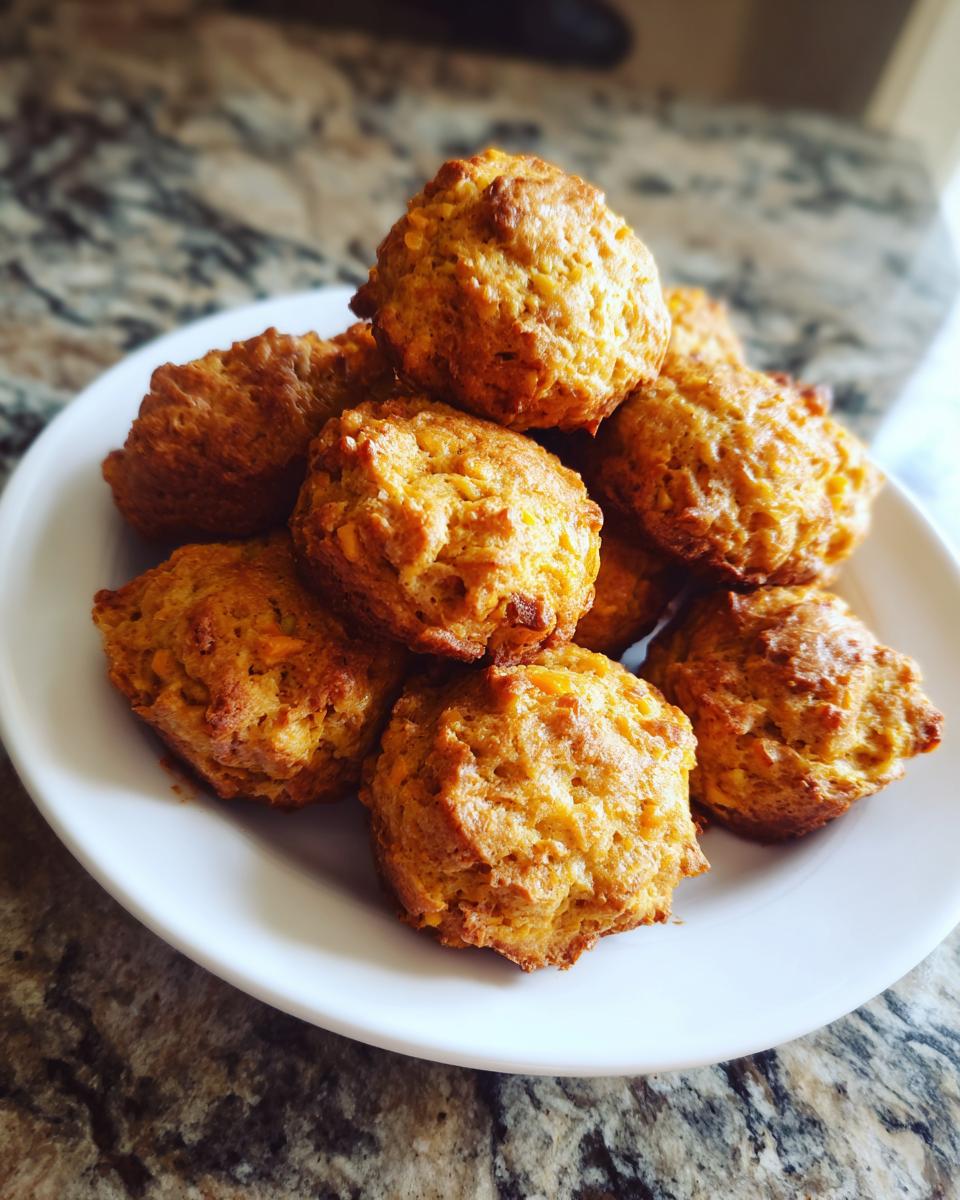
Shaping and Baking the Beef & Cheddar Training Treats
Alright, time to get those treats ready for the oven! Preheat *your* oven to 350°F (175°C) – this is super important! Next, lightly flour your countertop. Now, roll out your dough. Aim for about ¼ inch thick – not too thick, not too thin! Use a cookie cutter (or a knife if you’re feeling daring) and cut into small, bite-sized pieces. I usually go for about ½ inch to ¾ inch pieces. Perfect for rewarding those good behaviors! Place the cut treats onto a baking sheet. These can easily burn if they’re too small, so keep an eye out and adjust baking time if needed.
Time to bake! Pop those treats in the preheated oven for 15-20 minutes. Keep an eye on them, you want them to be golden brown! When they’re done, remove them from the oven and let them cool completely on the baking sheet before moving on. Make sure and don’t forget the timer! Oops! I have before.
Cooling and Storing Your Homemade Treats
Okay, the hardest part is over: *waiting*. Seriously, let those Beef & Cheddar Training Treats cool down *completely* before you give them to your dog! Trust me, hot treats won’t feel good. Also, this helps them crisp up just right. This is important to ensure they are fully cooked. Once they are thoroughly cooled, it’s time to store them. Pop them in an airtight container at room temperature. They should last about a week. But trust me, they probably won’t last that long—your dog will love these!
Tips for Perfect Beef & Cheddar Training Treats Every Time
Okay, so you’ve got the recipe down, now let’s talk about making those Beef & Cheddar Training Treats *perfect* every single time. Trust me, I’ve made a few batches (a *lot*), and I’ve learned a few things along the way!
First off, the dough consistency matters! If it’s too sticky, add a *tiny* bit more flour, a tablespoon at a time. Too dry? A splash of water usually does the trick. You want that Goldilocks consistency – just right! Baking time can vary, so keep an eye on those treats, and adjust as needed. Bigger treats need more time in the oven, and smaller ones might need less. And for goodness sake, don’t walk away from the oven – trust me, burnt treats are no fun (for you or your pup!).
My biggest tip? Don’t stress! Even if the first batch isn’t perfect, your dog will *still* love them. It’s all about love (and deliciousness), right?
Variations to Spice Up Your Beef & Cheddar Training Treats
Okay, so once you’ve nailed the basic Beef & Cheddar Training Treats, it’s time to get creative (if you want to!). Trust me, even Buster gets bored with the same treats all the time! Here’s a few of my favorite ways to change things up and keep those training sessions exciting!
Try swapping out the cheddar for a different dog-safe cheese like mozzarella, or even a bit of cottage cheese (just a little!). You could also add a sprinkle of fresh, chopped parsley or a tiny pinch of turmeric (it’s great for their joints!). Just remember to always introduce new ingredients slowly to make sure your pup’s tummy is happy. Experiment, have fun, and enjoy all the excited wags!
Frequently Asked Questions About Beef & Cheddar Training Treats
I know, I know, you have questions! Making homemade dog treats is awesome, but it’s totally normal to have a few concerns. Here are some of the most common questions I get about these yummy Beef & Cheddar Training Treats, so you can feel totally confident making them for your best friend. I’ve been there, done that, so let’s get you set!
Are these treats safe for all dogs?
That’s a super important question! These treats are generally safe for most dogs, but every dog is different. Some might have allergies or sensitivities. Before you go crazy giving them out, keep an eye out for any signs of an upset tummy or itchiness. If you have any concerns, you should totally talk to your vet – they know your pup best! And, of course, moderation is key. A few treats are fine, but don’t overdo it!
How long do these Beef & Cheddar Training Treats last?
Once you’ve baked up a batch of these goodies, you’ll want to know how long they’ll stay fresh. Assuming you store them the right way, they should last about a week, give or take. The secret to keeping your homemade dog treats fresh as can be is an airtight container. Make sure you let them cool down *completely* before popping them in. A sealed container is your best friend when it comes to keeping those treats tasty and crunchy! That keeps moisture out and flavor in. Perfect!
Can I freeze these homemade dog treats?
Absolutely! This is a great way to make a big batch and prevent treats from going bad. Just let the treats cool down completely, then pop them into a freezer-safe bag or container. You can store them in the freezer for up to a couple of months. When you’re ready to give one to your pup, just thaw them out at room temperature. They’ll be just as delicious as the day you made them! Freezing is a lifesaver, and I do this all the time.
Nutritional Information for Beef & Cheddar Training Treats
Okay, so, let’s talk about the important stuff – like what’s actually *in* these yummy treats! Now, keep in mind this is just an estimate, because it depends on the exact ingredients you use and their brands. But, here’s the general idea, per treat.
You can expect around 30 calories, 2g of fat, and 2g of protein. There’s also some carbs in there, about 2g, with minimal sugar and sodium. Pretty good huh? Remember, always in moderation, friends!
Serving Suggestions for Your Dog’s Beef & Cheddar Training Treats
Okay, so, now you’ve got these amazing Beef & Cheddar Training Treats, what do you DO with them? Well, they’re perfect for training! I use these for everything from basic commands to more complicated tricks. Their small size makes them ideal for positive reinforcement. Just have a few on hand and reward your pup every time they nail it! Plus, the yummy taste makes them extra motivating, which is always a plus! Happy training!
Ready to Make These Delicious Beef & Cheddar Training Treats?
Okay, friends, are you as excited as I am to get started? Trust me, your dog will LOVE these! Go ahead, whip up a batch of these Beef & Cheddar Training Treats and let me know what you think. Snap a pic of your happy pup and share the results! Leave a comment below, I can’t wait to hear how it goes!
Print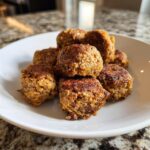
Beef & Cheddar Training Treats
- Total Time: 35 min
- Yield: 50 treats
- Diet: None
Description
Make delicious training treats for your dog with beef and cheddar.
Ingredients
- 1 pound ground beef
- 1 cup shredded cheddar cheese
- 1 egg
- 1/2 cup all-purpose flour
Instructions
- Preheat your oven to 350°F (175°C).
- In a bowl, combine ground beef, cheddar cheese, and egg.
- Mix in the flour until a dough forms.
- Roll out the dough to about 1/4 inch thickness.
- Cut the dough into small, bite-sized pieces.
- Place the treats on a baking sheet.
- Bake for 15-20 minutes, or until golden brown.
- Let the treats cool completely before giving them to your dog.
Notes
- Store treats in an airtight container.
- Adjust baking time depending on treat size.
- Prep Time: 15 min
- Cook Time: 20 min
- Category: Dog Treats
- Method: Baking
- Cuisine: American