Oh, the holidays! Is there anything better than that magical mix of cozy vibes and the irresistible urge to bake? For me, it always comes down to that iconic pairing: chocolate and peppermint. Seriously, my kitchen just doesn’t feel like Christmas until the sweet, minty scent of homemade Chocolate Peppermint Bark fills the air. It’s become one of those non-negotiable traditions, like tacky Christmas sweaters and watching ‘It’s a Wonderful Life’ for the hundredth time. This recipe is my absolute go-to because it’s ridiculously easy (you’ll see!) but looks and tastes so incredibly festive and special. It’s the kind of treat that makes everyone feel like you spent hours in the kitchen, even when you didn’t!
Why You’ll Love This Chocolate and Peppermint Bark
Seriously, this bark is a total showstopper with minimal effort. Here’s why it’s going to be your new holiday obsession:
- Super Easy Prep: Like, “kids can help” easy. No fancy skills needed!
- Festive Flavor Combo: That perfect blend of rich chocolate and crisp peppermint is simply divine.
- Gorgeous Look: The marbled swirls and colorful candy canes make it look like you bought it from a fancy candy shop.
- Perfect for Gifting: Wrap a few pieces in a pretty bag and you’ve got instant, thoughtful gifts!
- Party Ready: It’s always a hit at cookie exchanges and holiday gatherings.
Ingredients for Perfect Chocolate and Peppermint Bark
You only need a few things for this super simple, super scrumptious bark. Trust me, using good quality ingredients makes all the difference here! You’ll need:
- 12 ounces good quality semi-sweet chocolate, chopped (I like to use bars and chop them myself rather than chips if I can!)
- 12 ounces good quality white chocolate, chopped (Same goes for the white chocolate – give it a good chop!)
- 1 teaspoon peppermint extract (This gives it that lovely minty kick!)
- 1/2 cup crushed candy canes (Just throw them in a zip-top bag and give ‘em a good whack with a rolling pin!)
How to Make Chocolate and Peppermint Bark: Step-by-Step
Alright, here’s where the magic *really* happens! Making this Chocolate and Peppermint Bark is honestly so satisfying, and it only takes a few simple steps. Don’t be intimidated by melting chocolate; I’ll walk you through it. You’ve got this! Think of it like decorating classic chocolate chip cookies – just a bit more… wintry!
Melting and Layering the Chocolate for Your Chocolate and Peppermint Bark
First things first, grab a baking sheet and line it with parchment paper. This is your best friend for easy cleanup and unmolding later! Now, let’s melt the semi-sweet chocolate. The best way, in my opinion, is a double boiler, but you can totally do it in the microwave too. Just melt it in 30-second spurts, stirring really well in between, until it’s super smooth and glossy. No funky lumps allowed! Spread this luscious dark chocolate evenly all over your parchment paper. Think of it as your chocolate canvas!
Creating the Swirl and Adding Peppermint
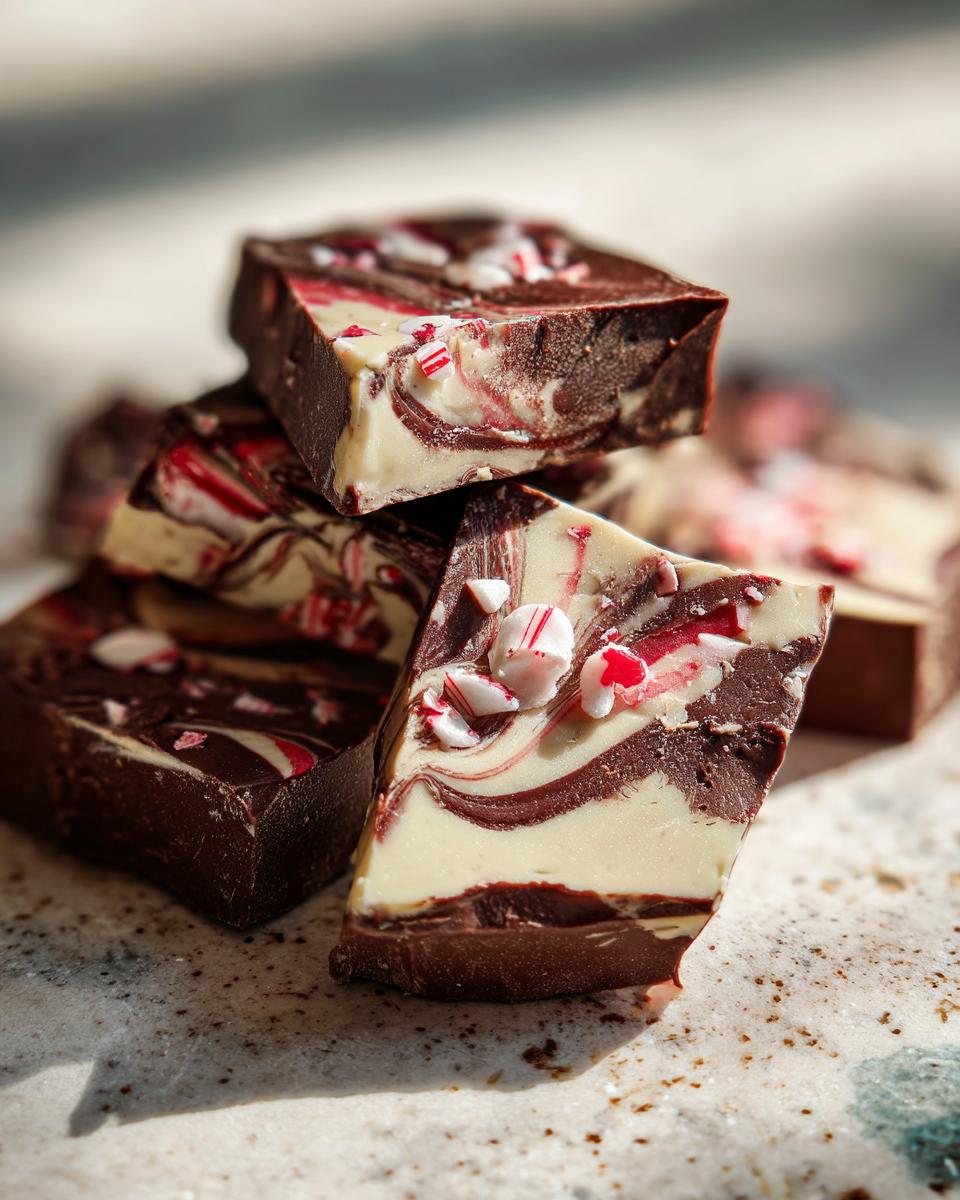
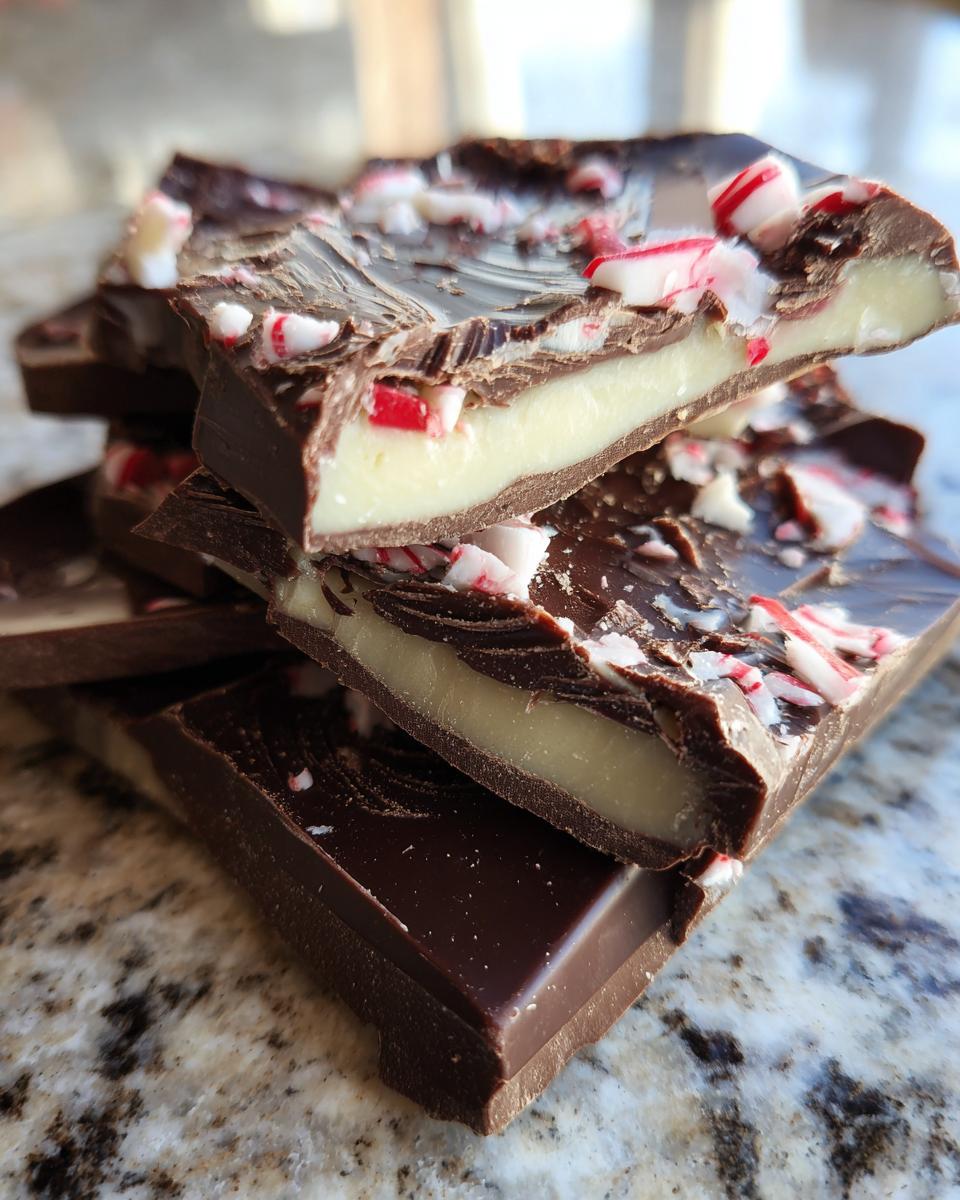
Next up is the white chocolate. Melt it the same way you did the semi-sweet, in a separate bowl, of course. Once it’s smooth and dreamy, stir in that teaspoon of peppermint extract. Oh, the smell! Now, here’s the fun part: drizzle that minty white chocolate all over the dark chocolate layer. Grab a toothpick or a skewer and gently swirl the two together. You want to get those gorgeous marbled patterns, but don’t over-mix it, or you’ll just end up with one muddy color. Work quickly here, because the chocolate starts setting fast!

Finishing Your Chocolate and Peppermint Bark
As soon as you’ve got your swirls looking fantastic, immediately sprinkle those crushed candy canes all over the top. Get them right into the still-wet chocolate so they stick! Now, let your beautiful creation sit out on the counter for about 30 minutes to start firming up. Then, pop it into the fridge for at least an hour, or until it’s totally firm to the touch. Once it’s nice and solid, just break it into pieces. Giant shards, small bites – whatever your heart desires!

Tips for the Best Chocolate and Peppermint Bark
Okay, so this bark is pretty foolproof, but if you want to elevate it from “good” to “OMG-I-need-this-every-day,” here are a few little tricks I’ve picked up. First off, when I say “good quality chocolate,” I really mean it! Using those chocolate bars you chop yourself instead of the chips makes a HUGE difference. Chips have stabilizers that can make them seize up when melting, and the flavor just isn’t as rich. So, grab some good Merckens or Ghirardelli bars if you can!
Now, about melting – patience is key! I always use a double boiler, gently stirring until it’s *completely* smooth. If you’re microwaving, keep it in short bursts and stir religiously. And for the love of all things minty, make sure not a single drop of water gets into your chocolate, or it’ll turn into a clumpy mess. If you *do* end up with a little bloom (that whitish film), don’t freak out! It’s totally safe to eat, just not as pretty. Simply refrigerate until firm, break apart, and enjoy. Keeping it airtight is also a biggie for freshness, just like these fabulous peanut butter brownies!
Ingredient Notes and Substitutions for Chocolate and Peppermint Bark
So, let’s chat about these ingredients for a sec. The chocolate is really the STAR here, so using good quality stuff makes a world of difference. I always go for bars that I chop myself since they melt so much smoother and taste way richer than regular chocolate chips. Semi-sweet is my go-to because it’s not too sweet, but if you’re a dark chocolate fan, feel free to use that – just make sure it’s a good brand! Milk chocolate works too, but it’ll make the bark sweeter.
As for the peppermint extract, it really packs a punch! Make sure it’s pure peppermint extract, not mint flavoring, for the best taste. If you’re not a huge peppermint person, or maybe you want to try something different, a tiny bit of spearmint extract could be fun, or even a touch of vanilla if you want to keep it simpler. And candy canes? Any kind will do! Just crush ‘em up.
Serving and Storing Your Homemade Chocolate and Peppermint Bark
This Chocolate and Peppermint Bark is just begging to be shared! It looks so pretty piled high on a holiday dessert platter or tucked into little cellophane bags tied with festive ribbon for an easy, thoughtful gift. It’s also just perfect for snagging a piece whenever that chocolatey, minty craving hits! When it comes to storing, keep it in an airtight container. If your kitchen is on the cooler side, room temperature is totally fine. But if it’s warm, pop it in the fridge to keep it nice and firm and prevent any dreaded melting!
Frequently Asked Questions About Chocolate and Peppermint Bark
Can I use milk chocolate instead of semi-sweet for this bark?
Absolutely! If you’re a big fan of milk chocolate, go right ahead. Just know that it will make the bark a bit sweeter overall. Some folks even like to do a layer of dark, a layer of milk, and then the white – talk about decadent! It all melts and swirls just the same. This recipe is super forgiving, kind of like my hot fudge pie!
How do I prevent chocolate from blooming? I hate that white dusty look!
Ugh, chocolate bloom is such a bummer, right? It usually happens when the chocolate isn’t tempered perfectly or when it gets too warm and then cools down again. With this easy bark recipe, since we’re not really tempering, it’s mostly about managing temperature. Make sure your chocolate is completely melted and smooth, then get it into the fridge until it’s really firm. Also, making sure you’re using good quality chocolate bars helps a lot. If it does bloom, don’t worry, it’s still totally edible and delicious, just maybe not as pretty.
Can I make this Chocolate and Peppermint Bark ahead of time? Like, way ahead?
Yes, you sure can! This is one of my favorite things about holiday candies like this. You can easily make this bark a week or even two weeks before you need it. Just store it in an airtight container, and try to keep it somewhere cool. If you layer it and break it up, you can even keep pieces separate with parchment paper layers in between so they don’t stick together. It’s perfect for getting a head start on your holiday baking!
What’s the best way to crush candy canes? I don’t want a powdery mess.
The easiest way is to grab a sturdy zip-top bag. Toss your candy canes in, seal it up tight, and then just give it a few good whacks with a rolling pin or even the flat side of a meat mallet. You want nice little crunchy pieces, not dust! If you’ve got a food processor, you can pulse them a few times, but keep an eye on it so you don’t turn them into powder. We want those little pops of peppermint! It’s almost as satisfying as making a perfect chocolate lava cake!
Estimated Nutritional Information
Just a heads-up, the nutritional info for treats like this can vary a bit depending on the brands of chocolate and candy canes you use. But, as a general idea, one ounce of this yummy Chocolate and Peppermint Bark is roughly:
- Calories: 150
- Fat: 8g
- Carbohydrates: 19g
- Sugar: 18g
- Protein: 2g
It’s definitely a treat, perfect for those festive moments!
Share Your Chocolate and Peppermint Bark Creations!
I absolutely LOVE seeing your creations! If you make this Chocolate and Peppermint Bark, please leave a comment down below and tell me how it turned out. Did you try any fun substitutions? I’d also love to see your pics, so tag me on social media! Knowing you’re all making and enjoying these recipes makes my heart so happy. It’s why I do this, just like sharing my story on our about page or hearing from you through our contact page!
Print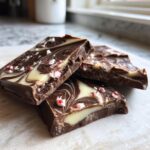
Chocolate Peppermint Bark
- Total Time: 130 min
- Yield: 16 servings
- Diet: Vegetarian
Description
A simple recipe for homemade chocolate peppermint bark with crushed candy canes.
Ingredients
- 12 ounces good quality semi-sweet chocolate, chopped
- 12 ounces good quality white chocolate, chopped
- 1 teaspoon peppermint extract
- 1/2 cup crushed candy canes
Instructions
- Line a baking sheet with parchment paper.
- Melt the semi-sweet chocolate in a double boiler or microwave in 30-second intervals, stirring until smooth.
- Spread the melted semi-sweet chocolate evenly onto the prepared baking sheet.
- Melt the white chocolate in a separate double boiler or microwave in 30-second intervals, stirring until smooth. Stir in the peppermint extract.
- Drizzle the melted white chocolate over the semi-sweet chocolate layer.
- Using a toothpick or skewer, swirl the white chocolate into the semi-sweet chocolate to create a marbled effect.
- Immediately sprinkle the crushed candy canes evenly over the chocolate.
- Let the bark set at room temperature for about 30 minutes, then refrigerate for at least 1 hour, or until firm.
- Once firm, break the bark into pieces.
Notes
- Use good quality chocolate for the best flavor and texture.
- Ensure the chocolate is completely melted and smooth before spreading.
- Work quickly when swirling the chocolates and adding the candy canes, as the chocolate will start to set.
- Store the bark in an airtight container at room temperature or in the refrigerator.
- Prep Time: 20 min
- Cook Time: 10 min
- Category: Dessert
- Method: No Bake
- Cuisine: American