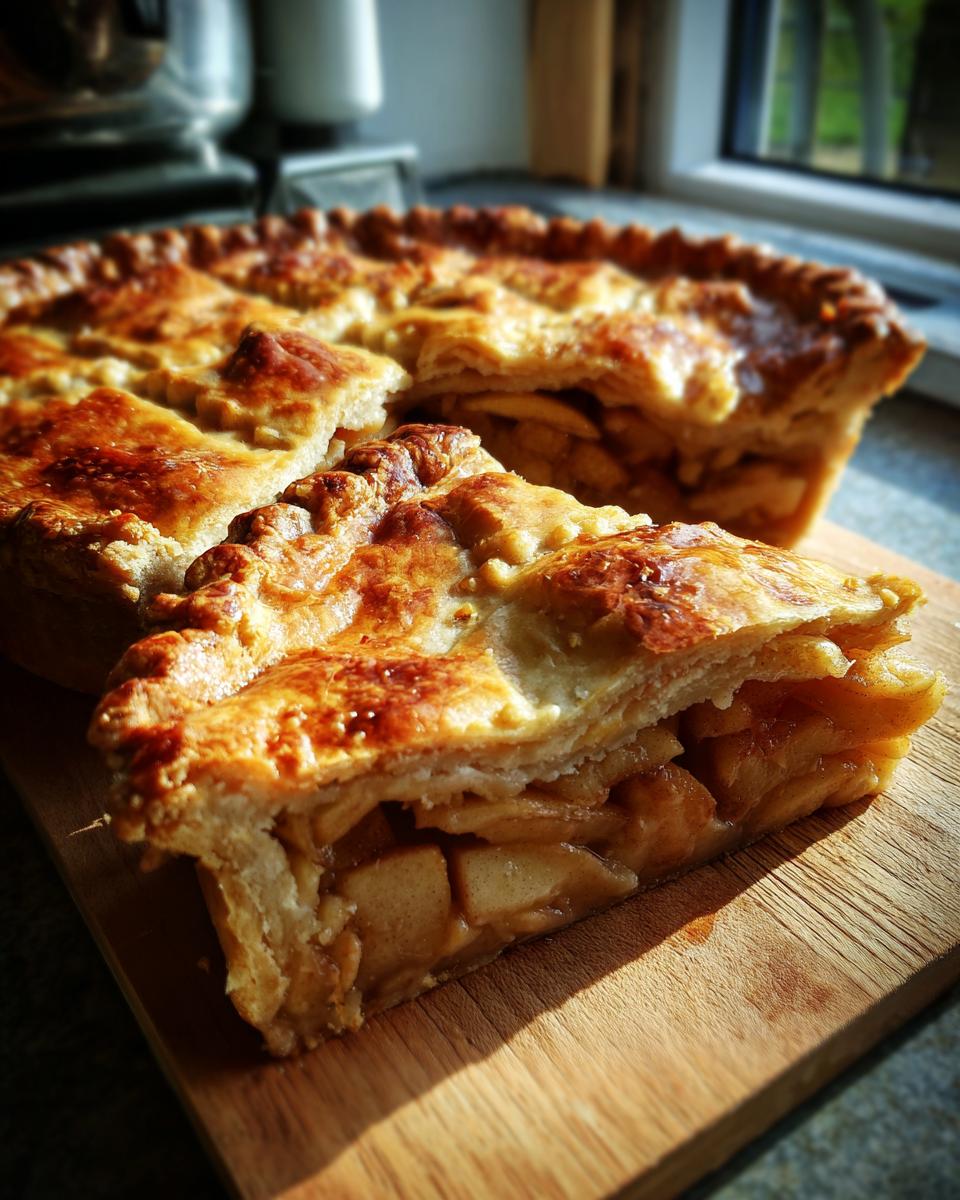
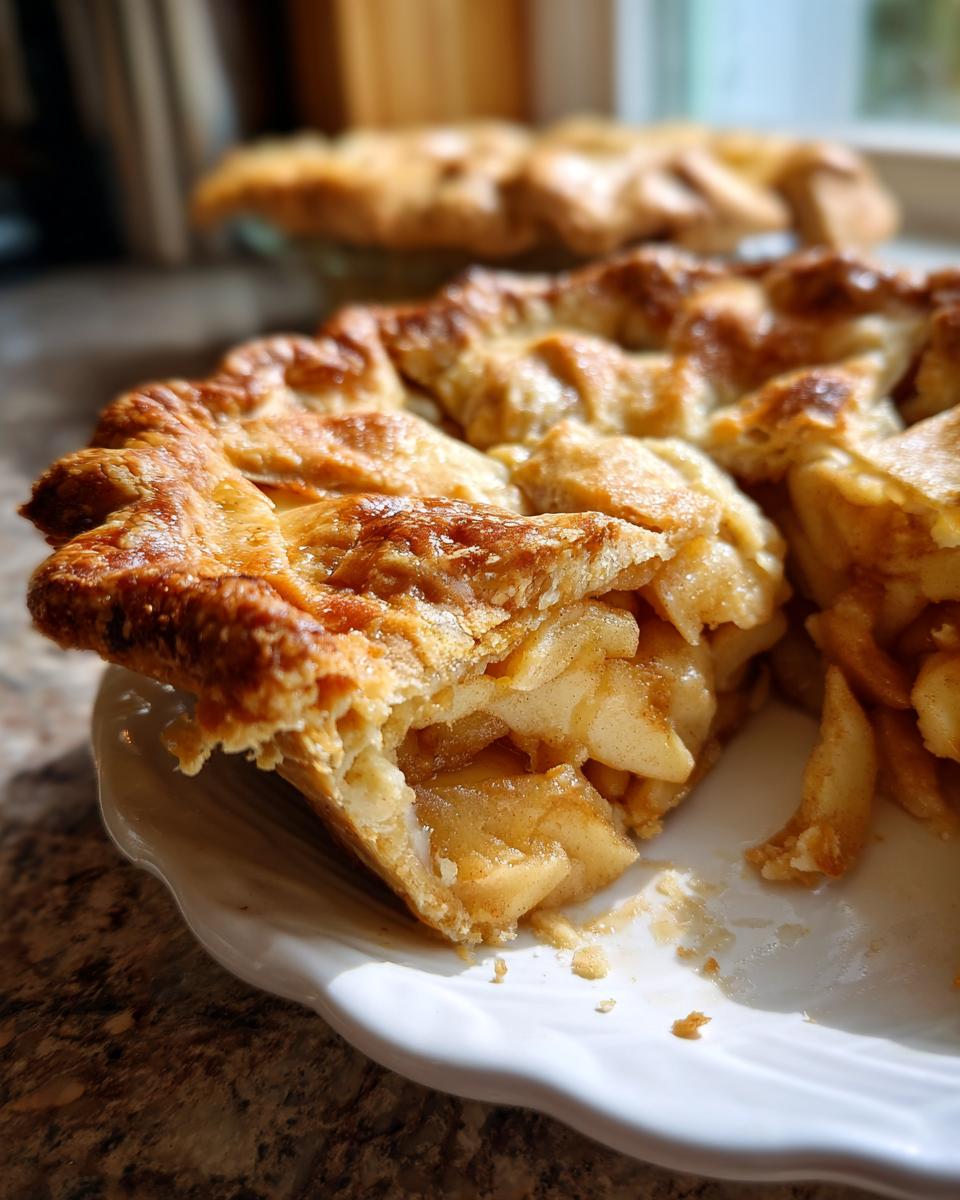
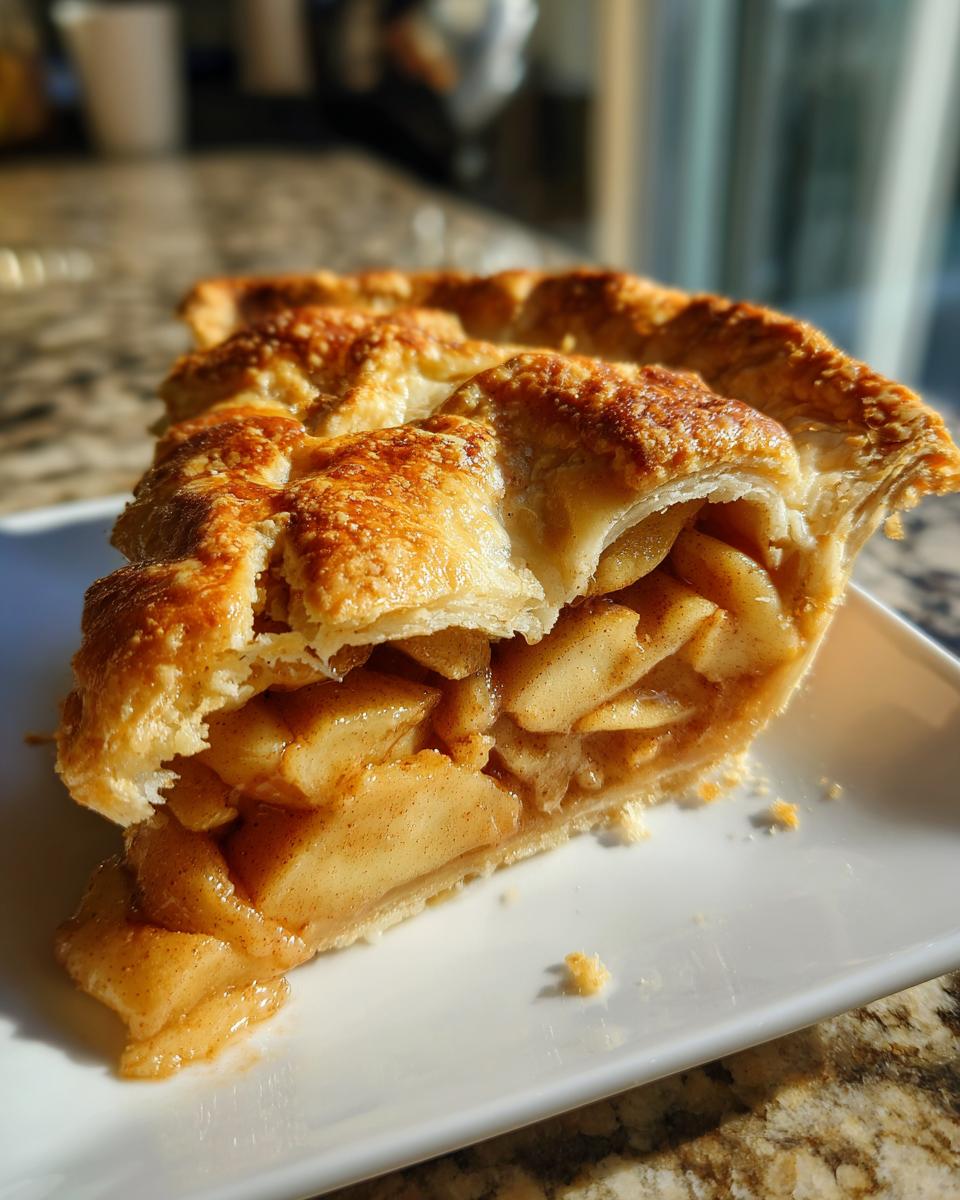
Oh, that smell! Is there anything better than the aroma of a warm apple pie baking in your kitchen? It just screams comfort, doesn’t it? For me, there’s nothing quite like a slice of **Classic Apple Pie with Flaky Butter Crust**. It’s the kind of dessert that brings everyone together. I swear, the moment my grandma pulled her apple pie out of the oven – with that golden, buttery crust and the sweet, spiced apple filling bubbling away – you just knew it was going to be a special day. This recipe is all about that perfect tender, flaky crust and a filling that’s just bursting with cinnamon and apple goodness. It’s truly a taste of home!
Why You’ll Love This Classic Apple Pie with Flaky Butter Crust
Seriously, why wouldn’t you want to make this pie? It’s the absolute best for so many reasons:
- Super Easy to Bake: Even if you’re new to pie-making, this recipe is totally doable!
- Unbeatable Flavor: That perfect mix of sweet apples and warm spices? Pure magic!
- Impressive Results: You’ll look like a pro with that gorgeous golden, flaky crust.
- Pure Comfort Food: It’s like a warm hug in every single bite.
- The Best Crust Ever: I’m talking buttery, flaky perfection that just melts in your mouth.
Ingredients for Your Classic Apple Pie with Flaky Butter Crust
Alright, let’s gather our goodies! For this amazing pie, you’ll need:
- One recipe for a double pie crust (Don’t worry, I’ve got your back with my favorite flaky crust recipe coming up soon, but for now, use your go-to or a good store-bought one!)
- About 6 medium apples – I like to use a mix of tart and sweet, like Granny Smith and Honeycrisp, but use what you love! Make sure they’re peeled, cored, and sliced up nice and thin.
- 3/4 cup granulated sugar – This sweetens things up just right.
- 2 tablespoons all-purpose flour – This helps thicken up all those lovely apple juices.
- 1 teaspoon ground cinnamon – Because what’s apple pie without cinnamon?
- A little pinch of ground nutmeg (1/4 teaspoon) – It just adds that extra warmth, trust me.
- 1/4 teaspoon salt – It balances out all the sweetness.
- 1 tablespoon of lemon juice – This brightens up the apple flavor and stops them from browning too much.
- 2 tablespoons of unsalted butter, cut into teeny-tiny pieces – These little guys melt into the apples and make everything so rich.
- 1 egg, beaten – This is our shiny egg wash to make the crust beautiful.
- And finally, 1 tablespoon of granulated sugar for sprinkling on top – for that extra sparkle and crunch!
Crafting the Perfect Flaky Butter Crust
Okay, this is where the magic *really* happens for our Classic Apple Pie with Flaky Butter Crust! The secret to a truly flaky pie crust? Keep everything super cold and don’t manhandle the dough. Seriously, it’s like a gentle hug, not a wrestling match.
First things first, make sure your butter and your water are ice cold. I’m talking ice cubes in the water cold! Take your chilled butter, cut into small cubes, and toss it into your flour mixture. Now, grab a pastry blender or two forks and start cutting that butter into the flour until it looks like coarse crumbs with some pea-sized bits still peeking through. Those little butter chunks are gonna create those amazing flaky layers when they melt in the oven!
Next, you’ll add just enough ice water, a tablespoon at a time, to bring the dough together. Mix it until it *just* starts to form a cohesive ball. Overmixing is the enemy here! Once it comes together, divide it into two discs, wrap them up tight in plastic wrap, and pop them in the fridge for at least 30 minutes. This chilling time is crucial – it lets the gluten relax and firms up that butter again. Trust me, this little bit of patience makes all the difference for that perfect, buttery flakiness!
Assembling Your Classic Apple Pie
Alright, dough is chilled, apples are prepped – it’s time to put this beauty together! Grab one of those lovely chilled crusts and gently press it into your 9-inch pie plate. Don’t stretch it too much, just ease it in there. Trim off any really wild overhang, but leave a little extra for crimping later.
Now for those gorgeous apples! Give them a final gentle toss in that spice mixture. Make sure every single slice is coated – you want that cinnamon-sugar goodness everywhere! Spoon this glorious apple filling right into your crust-lined plate. Try to get it as evenly piled as you can. Oh, and don’t forget those little pats of butter! Dot them all over the top of the apples; they’ll melt down and make everything extra luscious.
Next up, the top crust! Lay that second chilled dough over the filling. Now, you can trim and crimp the edges to seal everything up, getting creative with your pattern! And make sure you cut a few vents in the top. Little slits, a star shape, whatever you like! This helps the steam escape so your pie doesn’t get all weird and puffy.
Baking Your Delicious Classic Apple Pie
Okay, the moment of truth! We’re going to bake this beautiful pie until it’s golden and bubbly. First things first, crank your oven up really hot to 425°F (220°C). This initial blast of heat is what gives us that amazing flaky, puff pastry effect. Pop your assembled pie in there and let it bake for about 15 minutes.
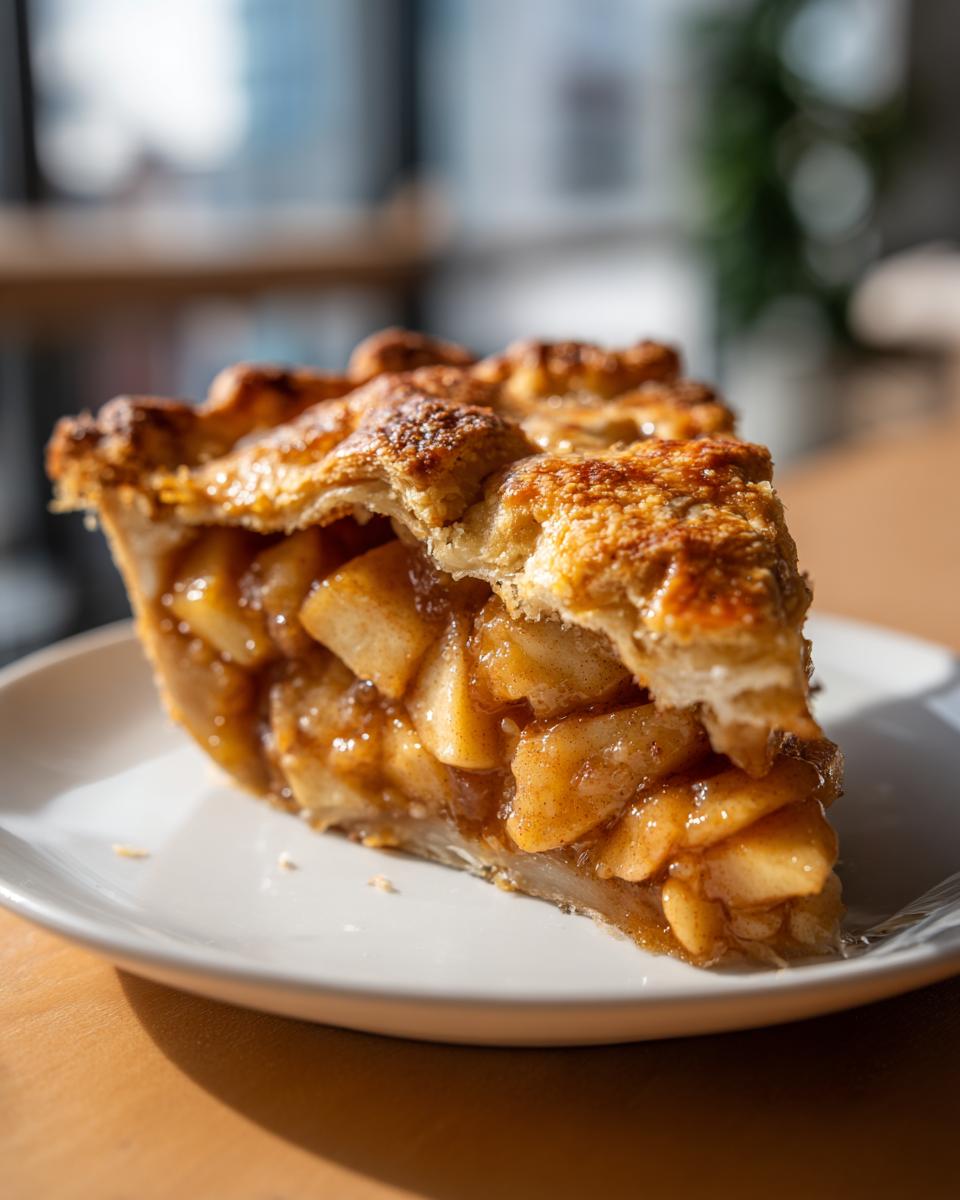
Now, turn that oven temperature down to 375°F (190°C). This is where the pie will gently bake through and get beautifully golden. You’ll want to keep an eye on it for another 35-45 minutes. How do you know it’s done? The crust should be a gorgeous deep golden brown, and you’ll see the apple filling simmering and bubbling happily through those vents you cut. If you see the crust getting a *little* too dark around the edges before the filling is ready, no worries! Just loosely tent it with some aluminum foil. It’s like giving your pie a cozy little hat!
And for the finishing touch before it goes in? That egg wash you prepared! Brush it all over the top crust for a lovely sheen, then sprinkle on that last tablespoon of sugar. It gives it a fantastic little crunch and sparkle. Once it’s out of the oven, resist the urge to slice into it immediately! Seriously, let it cool on a wire rack for at least 2 hours. This is super important for the filling to set up properly. Trust me, it’s worth the wait for that perfect slice. If you’re planning a meal, maybe try a simple side salad while your pie cools!
Tips for the Ultimate Classic Apple Pie with Flaky Butter Crust
Want to make your apple pie absolutely legendary? Let me share a few secrets to guarantee a show-stopping result every single time. These little tricks really make a difference for that Classic Apple Pie with Flaky Butter Crust!
Mixing Your Apples is Key: Don’t just grab any old apples! For the best flavor and texture, try using a mix. I absolutely love Granny Smith for their tartness – they hold their shape and give a nice zing. Then, I’ll toss in some Honeycrisp or Fuji for sweetness and a softer bite. It just creates this amazing depth that one type of apple can’t deliver on its own. Toss them gently with your sugar and spices, and make sure every slice gets coated!
Beat the Soggy Bottom Blues: Nobody wants a sad, soggy bottom crust, right? A trick my grandma taught me is to pre-bake the bottom crust for about 10-15 minutes before adding the filling. Just blind-bake it until it’s lightly golden. This gives it a head start and ensures it stays nice and firm against that delicious apple filling. Another tip is to make sure your flour to apple ratio is just right – too much liquid and not enough thickener spells disaster!
Know Your Oven’s Quirks: Ovens can be tricky! They don’t always heat evenly. If you notice your beautiful crust browning *too* fast, don’t panic! Just loosely tent the edges (or the whole pie) with a piece of aluminum foil. This protects those gorgeous golden bits while the inside finishes baking. It’s like giving your pie a little shield!
Serving and Storing Your Homemade Pie
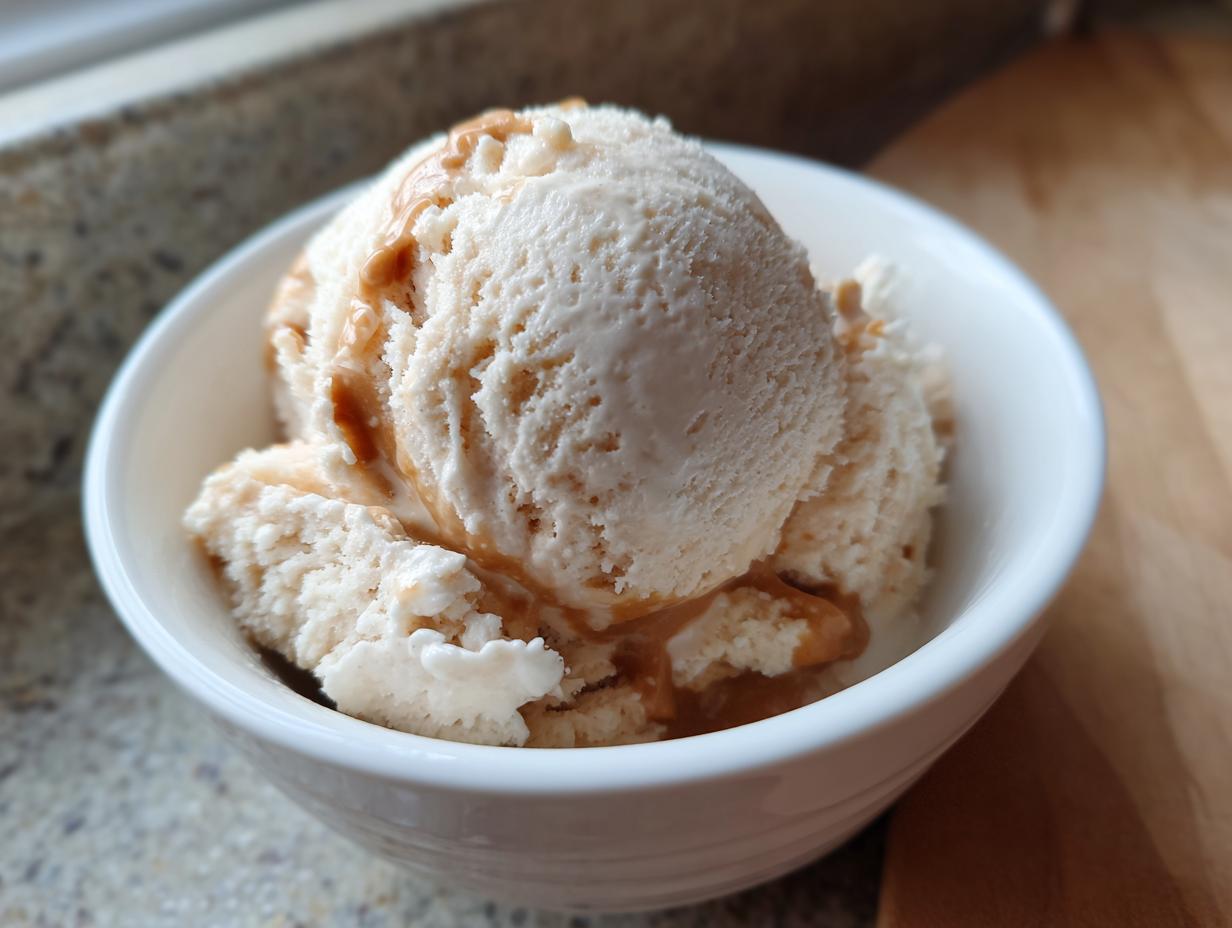
Now for the best part – enjoying your masterpiece! This pie is absolutely divine served slightly warm, so it’s perfect after about 2 hours of cooling. It’s extra special with a dollop of homemade whipped cream, maybe something like my spiced whipped cream? Or a scoop of vanilla ice cream works wonders too!
Got leftovers? Lucky you! Just cover the pie loosely with plastic wrap or foil and keep it at room temperature for up to two days. If it’s been longer, or your kitchen is super warm, pop it in the fridge. To reheat, just pop a slice in a warm oven (around 300°F or 150°C) for about 10-15 minutes until it’s cozy again!
Frequently Asked Questions About Classic Apple Pie
What are the best apples for apple pie?
Oh, this is a great question! For the ultimate flavor and texture in your Classic Apple Pie with Flaky Butter Crust, I always love using a mix of apples. Tart apples like Granny Smith are fantastic because they hold their shape and give a nice zingy contrast to the sweet filling. Then, I’ll add in some sweeter, softer apples like Honeycrisp, Fuji, or Gala for that lovely natural sweetness and a slightly softer bite. Using a combination just makes for a more complex and delicious pie!
Can I use store-bought pie crust?
Absolutely! Listen, I love making my own crust, and that flaky butter crust is my pride and joy, but life gets busy! If you’re short on time, a good quality store-bought pie crust will totally work. Just make sure it’s a good one, and handle it gently. The key is still keeping it cold and not overworking it, even if it’s pre-made. It’ll still be a delicious pie!
How do I prevent my pie from getting a soggy bottom?
Nobody likes a soggy bottom! A couple of tricks can help. First, make sure your filling isn’t too wet. Cook down your apples *slightly* before putting them in the crust, or make sure you have enough flour or cornstarch to thicken things up. Also, pre-baking your bottom crust for about 10-15 minutes before adding the filling (this is called blind baking) can really make a difference. And ensure your oven is hot enough when you start baking – that initial heat helps set the bottom crust quickly!
Can I make the pie ahead of time?
Yes, you sure can! You can assemble the entire pie a day ahead and store it, unbaked, in the refrigerator. If you do this, you might need to add a few extra minutes to the baking time. Alternatively, you can bake the pie completely, let it cool, and then store it. Reheat it gently in a low oven (around 300°F or 150°C) for about 15-20 minutes to bring it back to life. Just be aware that the crust might not be *quite* as perfectly crisp as when it’s fresh out of the oven.
Estimated Nutritional Information
Just a heads-up, all these delicious ingredients and that perfect pie come with estimated nutritional values. Keep in mind that these numbers can change a bit depending on the exact ingredients you use and, of course, how big you slice that beauty! This is just a general idea per serving:
- Calories: About 350
- Fat: Around 18g (with 10g saturated)
- Protein: Roughly 3g
- Carbohydrates: About 45g
- Sugar: Around 30g
- Sodium: Approximately 200mg
So, enjoy a slice (or two!) – it’s totally worth it!
Print
Classic Apple Pie with Flaky Butter Crust
- Total Time: 80 min
- Yield: 8 servings
- Diet: Vegetarian
Description
A traditional apple pie recipe featuring a tender, flaky crust made with butter and a sweet, spiced apple filling.
Ingredients
- 1 recipe for double pie crust
- 6 medium apples, peeled, cored, and sliced
- 3/4 cup granulated sugar
- 2 tablespoons all-purpose flour
- 1 teaspoon ground cinnamon
- 1/4 teaspoon ground nutmeg
- 1/4 teaspoon salt
- 1 tablespoon lemon juice
- 2 tablespoons unsalted butter, cut into small pieces
- 1 egg, beaten (for egg wash)
- 1 tablespoon granulated sugar (for sprinkling)
Instructions
- Preheat your oven to 425°F (220°C).
- Line a 9-inch pie plate with one pie crust.
- In a large bowl, combine the sliced apples, 3/4 cup sugar, flour, cinnamon, nutmeg, salt, and lemon juice. Toss to coat the apples evenly.
- Pour the apple mixture into the prepared pie crust.
- Dot the top of the apple filling with the small pieces of butter.
- Place the second pie crust over the filling. Trim and crimp the edges to seal. Cut vents in the top crust to allow steam to escape.
- Brush the top crust with the beaten egg wash and sprinkle with the remaining 1 tablespoon of sugar.
- Bake for 15 minutes at 425°F (220°C).
- Reduce the oven temperature to 375°F (190°C) and continue baking for 35-45 minutes, or until the crust is golden brown and the filling is bubbly.
- Let the pie cool on a wire rack for at least 2 hours before serving.
Notes
- For best results, use a mix of apple varieties, such as Granny Smith and Honeycrisp, for a balanced flavor.
- If your crust starts to brown too quickly, you can loosely tent it with aluminum foil.
- Prep Time: 30 min
- Cook Time: 50 min
- Category: Dessert
- Method: Baking
- Cuisine: American