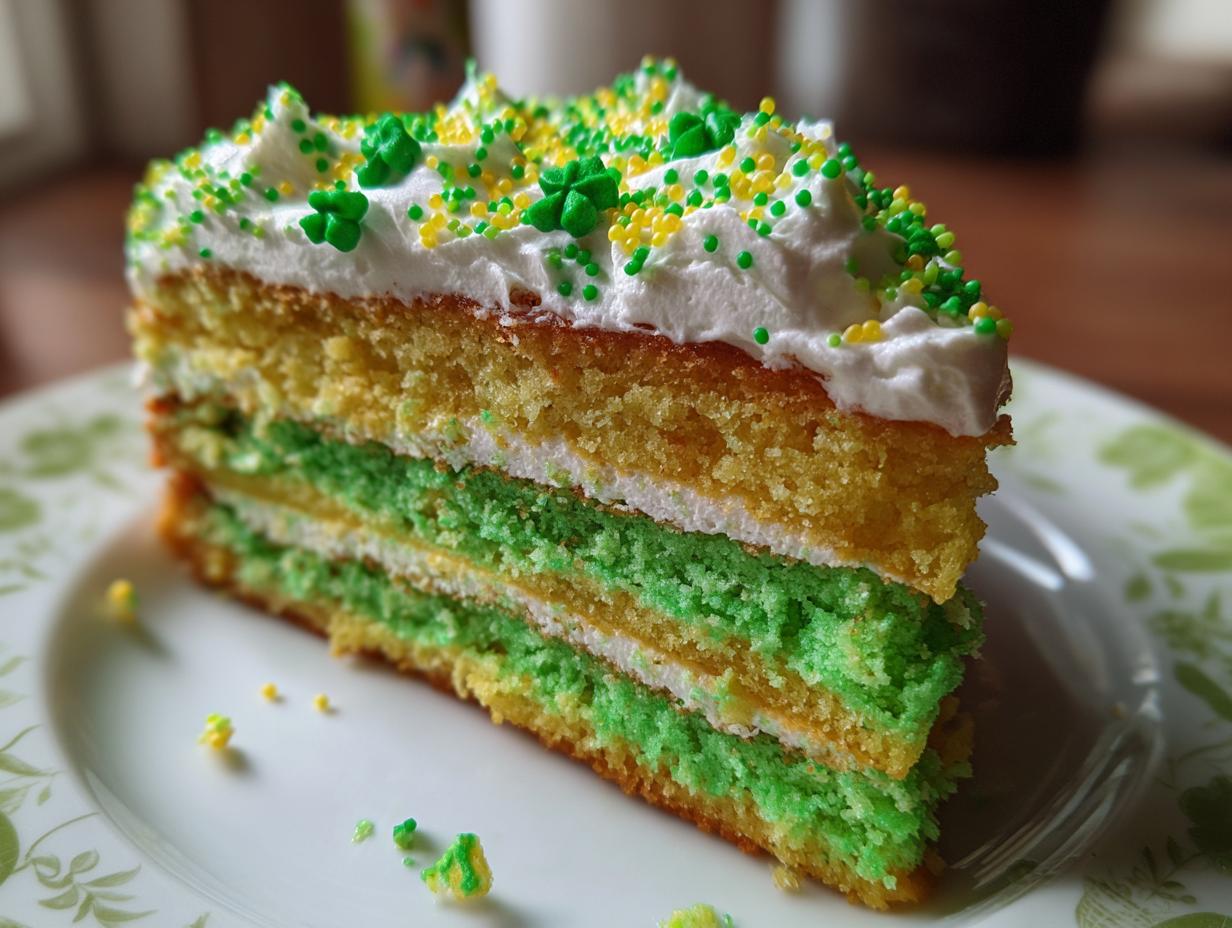
Aaaah Mardi Gras! The beads, the parades, the craziness… and, of course, the Classic King Cake! Every year, as soon as January hits, I start dreaming of that sweet, cinnamon-y, colorful masterpiece. For my family, it’s not just a cake; it’s a tradition. We always make it together, and it wouldn’t be Mardi Gras without that little plastic baby hidden inside (careful, it’s a choking hazard!).
This year, I’m sharing my absolute favorite, super-easy Classic King Cake recipe. Trust me, even if you’re not a seasoned baker, you can totally nail this. It’s a total crowd-pleaser, and the best part? It tastes like a party in your mouth! Let’s get baking, y’all!
Why You’ll Love This Classic King Cake Recipe
Okay, so why should *you* make this Classic King Cake? Because trust me, it’s worth it! Here’s why this recipe is my go-to every single year:
- Super Easy! Seriously, I’m not a professional baker, and I can rock this. The dough is pretty forgiving, too!
- Delicious, Delicious, Delicious! This cake is a total flavor explosion, from the cinnamon-y dough to the sweet icing and colorful sprinkles. Yum!
- It’s a Party! Making this is so much fun, especially if you get the kids (or your friends!) involved. Get those sprinkles ready!
- Authentic and Delicious: This recipe is based on my grandma’s, who was from New Orleans. It’s the real deal, y’all!
So, what are you waiting for? Time to get baking!
Ingredients for the Perfect Classic King Cake
Alright, let’s get down to the good stuff: the ingredients! You’ll need some basics, with a few key players to make this Classic King Cake sing. First off, grab 1 cup of milk – make sure it’s warmed to about 110°F (that’s lukewarm to the touch, you don’t want it too hot!). Then, you’ll need 2 ¼ teaspoons of active dry yeast to get that dough rising. Oh, and don’t forget the other goodies like all-purpose flour, granulated sugar, butter (make sure it’s nice and softened!), and the eggs.
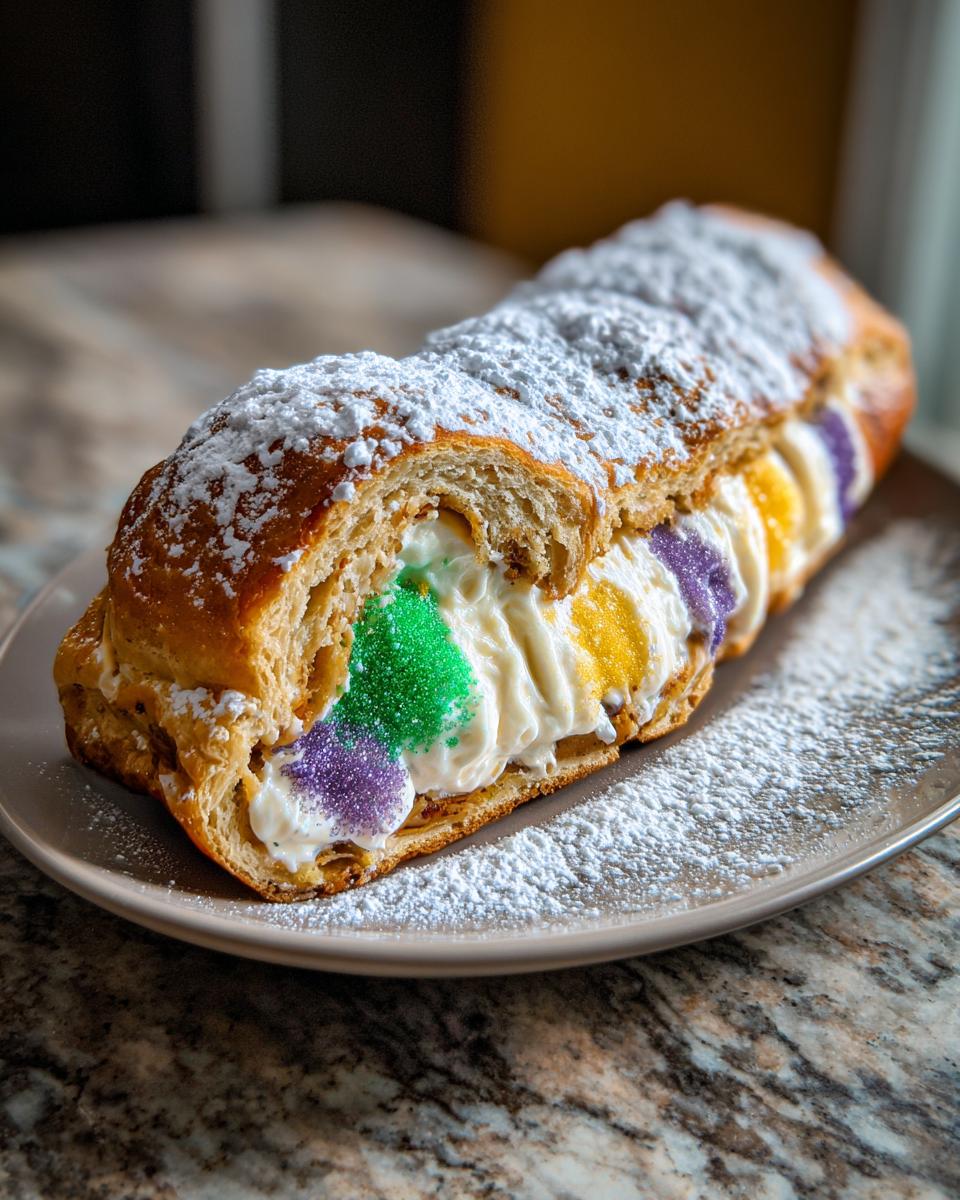
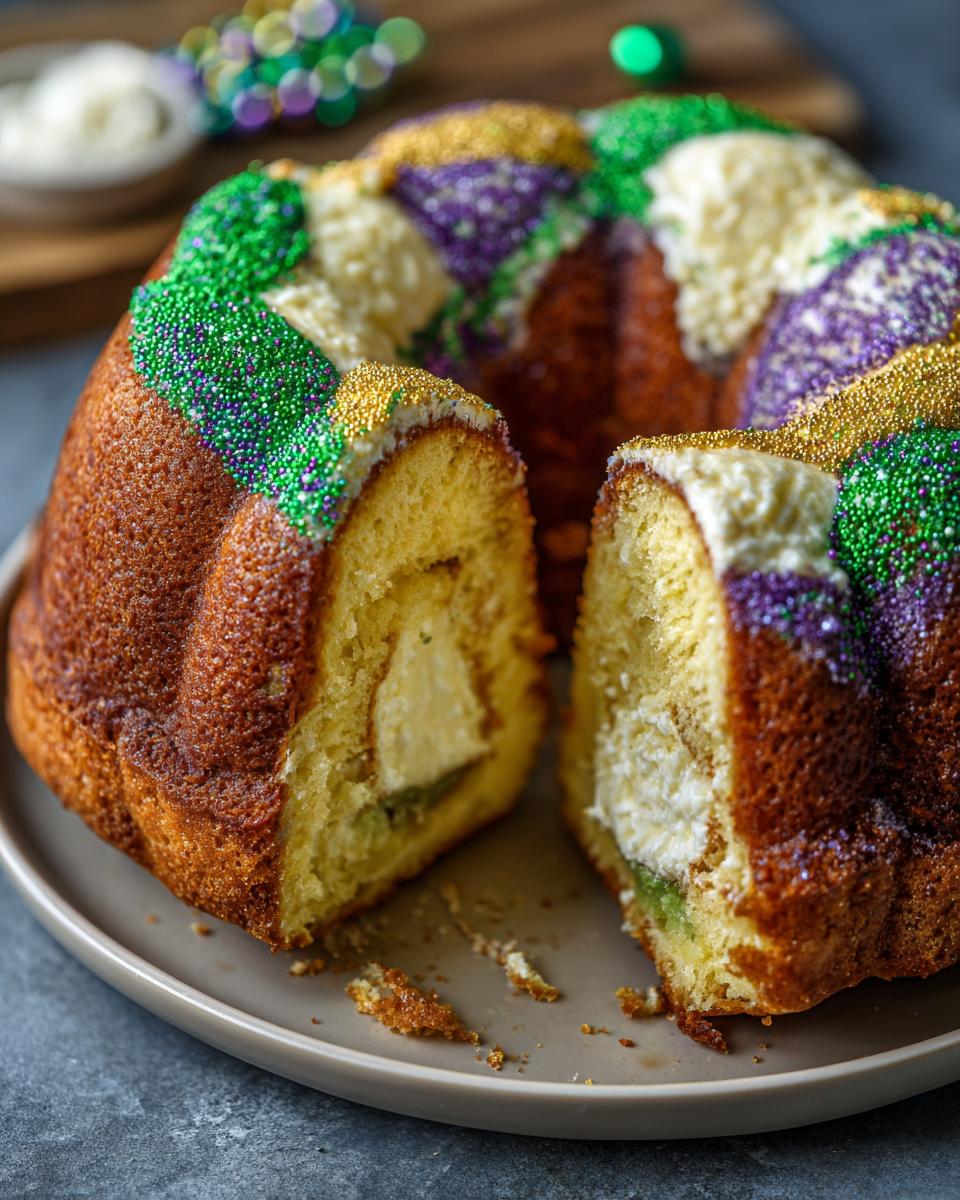
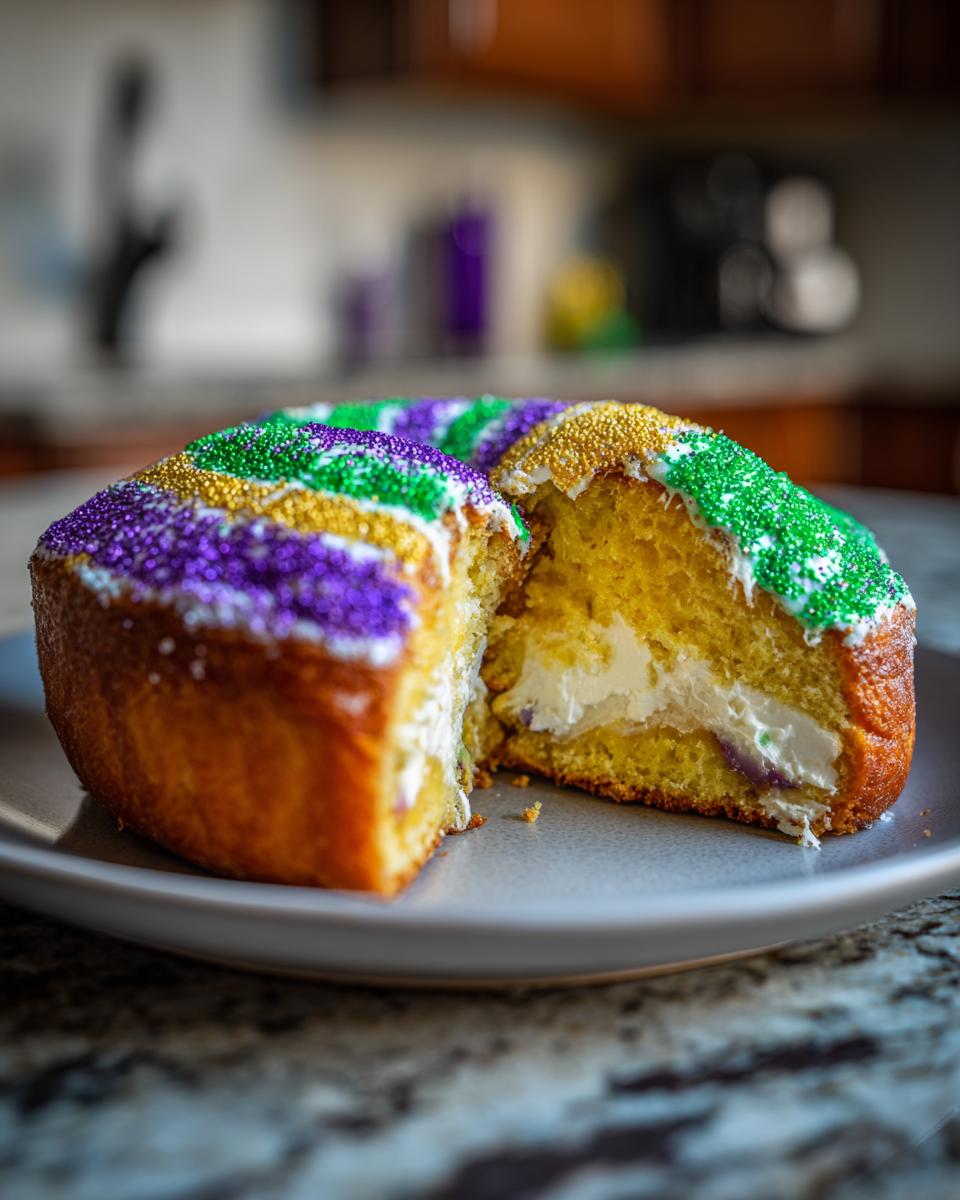
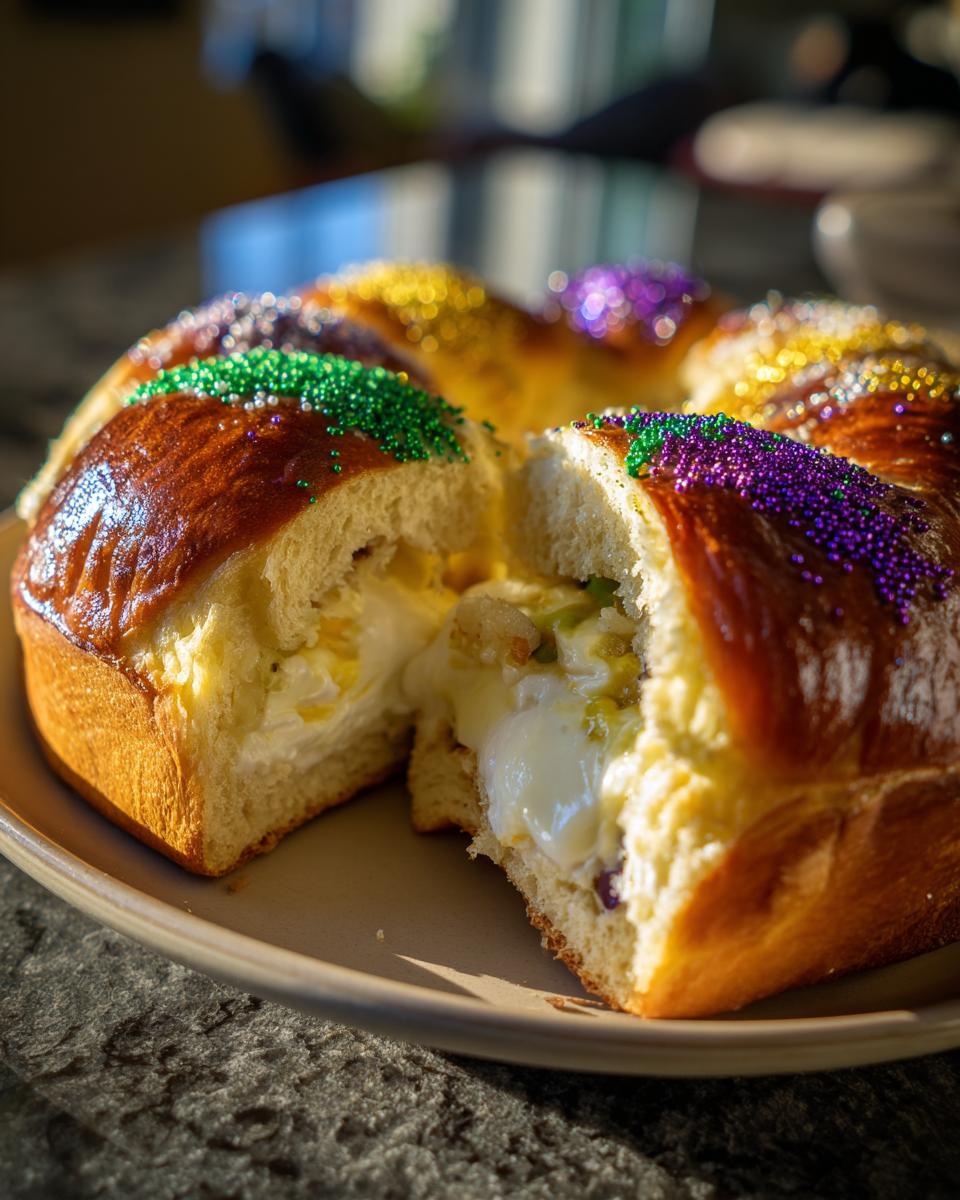
And for those festive touches? Green, purple, and gold sanding sugar for that true Mardi Gras look! You can add cream cheese filling (that’s optional, but I highly recommend it!).
Equipment You’ll Need
Okay, before we get started, let’s make sure you have the right tools! You’ll need a big mixing bowl (or a stand mixer, if you’re fancy!), a measuring cup and spoons, a baking sheet, and some plastic wrap to let that dough rise. Also, a rolling pin is a must-have for shaping the cake and a whisk for the icing!
Step-by-Step Instructions: Making Your Classic King Cake
Alright, y’all, let’s get down to the fun part: making this amazing Classic King Cake! Don’t you worry, it might seem like a lot, but I’ll walk you through every single step. Just trust me, and you’ll be enjoying a slice of heaven in no time. Get ready for some serious deliciousness! Here we go!
Preparing the Dough
So, first things first! In a big bowl (or your stand mixer), pour in that warmed milk, then sprinkle in the yeast and sugar. Give it a gentle swirl, and then let it sit for about 5 minutes. You’ll see it get all foamy and bubbly! Next, add in the salt, nutmeg, and about half of the flour. Stir it up, then toss in the softened butter, eggs, and vanilla. Mix it all until it starts to come together.
Now, here comes the fun (I mean, messy) part! Add the rest of the flour little by little! At this point, switch into kneading mode! If you have a stand mixer with a dough hook, let it do its thing for around 5-7 minutes. If not, don’t worry! Lightly dust a clean counter with flour, then knead the dough by hand for about 5-7 minutes until it’s nice and smooth and a little bit elastic. Careful not to over-knead!
Shaping and Rising the Classic King Cake
Okay, once that dough is ready, it’s time to let it rise! Lightly grease a big bowl, pop the dough inside, and cover it with plastic wrap. Let it sit in a warm place for about an hour, or until it’s doubled in size. This rising part is super important, so don’t rush it! I usually put it near the oven or in a slightly warm spot.
Once your dough has risen, it’s time for the fun bit – shaping it! Gently punch the dough down to release the air. On a lightly floured surface, roll it out into a big rectangle. Then, roll the dough into a log and form it into a ring, pinching the ends together to seal it up. Place it on a baking sheet lined with parchment paper. If you’re adding cream cheese filling, now’s the time!
After you have shaped your dough, cover and let it sit for another 30 minutes. This is for a final rise!
Baking and Decorating Your Classic King Cake
Alright, preheat the oven to 350°F (175°C). Then, pop that beauty into the oven for about 25-30 minutes, or until it’s golden brown. Keep an eye on it! You want it cooked through but not burnt. You’ll know it’s done when a toothpick inserted in the center comes out clean. Carefully, take it out of the oven
Once it’s cooled, it’s time for the best part: decorating! In a separate bowl mix up your icing! I usually just use a simple powdered sugar glaze (powdered sugar, a splash of milk or lemon juice, and a dash of vanilla extract). Drizzle the icing all over that gorgeous cake, and then go wild with those green, purple, and gold sprinkles! That’s it! You’ve officially made a Classic King Cake fit for Mardi Gras! Now, grab a slice!
Tips for Classic King Cake Success
Want to make your Classic King Cake extra, *extra* amazing? Here are a few things I’ve learned over the years that make all the difference! First, make sure your milk is *just* the right temperature – around 110°F is key for waking up that yeast! Proofing your yeast (letting it sit in the warm milk and sugar mixture) is another must-do! If it doesn’t get frothy in about 5 minutes, your yeast is probably dead, and you’ll want to start with a new batch. And, finally, watch that dough! You want it soft enough to work with but not sticky. It should feel smooth and elastic!
Variations on the Classic King Cake Theme
So, you’ve mastered the classic? Amazing! Now, let’s get a little crazy and jazz things up! You can totally switch up the filling – try a luscious lemon cream cheese, or even a spicy pecan praline. If you’re feeling extra, experiment with different flavors for the dough itself! A little orange zest in the dough can add a lovely summery twist.
And don’t be afraid to change up the toppings, too! Ditch the traditional sprinkles and try a simple powdered sugar glaze.
Serving Suggestions for Your Classic King Cake
Okay, so you’ve baked your beautiful Classic King Cake, and now it’s time to EAT! The hardest part of the job is done – congrats! I highly recommend a big mug of strong, hot coffee with a slice of this tasty cake. If you’re feeling fancy, a festive cocktail or a cup of hot tea also goes perfectly! Honestly, no matter what you serve with it, it’s gonna be delicious.
Storage and Reheating Instructions
So, you’ve got a gorgeous Classic King Cake, and you probably won’t eat it all at once! No worries, you can totally keep it fresh. Just store it in an airtight container or wrap it tightly in plastic wrap. It should last for about 3-4 days at room temperature. Want to make your cake last even longer? You can freeze it! Wrap it up well, then thaw it in the fridge overnight before serving.
Reheating is super easy! Pop a slice in the microwave for a few seconds (careful, it can heat up fast!) or warm it gently in the oven for a few minutes. Yum!
Nutritional Information (Disclaimer)
Okay, here’s the deal: The nutrition info I’m giving you is just an estimate. It can totally change depending on the brands of ingredients you use and any substitutions you make. So, don’t take it as gospel, got it? Enjoy your King Cake!
Print
Classic King Cake
- Total Time: 1 hour
- Yield: 12 servings
- Diet: Vegetarian
Description
A traditional pastry for Mardi Gras celebrations.
Ingredients
- 1 cup milk, warmed
- 2 ¼ teaspoons active dry yeast
- ½ cup granulated sugar
- ½ teaspoon salt
- ½ teaspoon ground nutmeg
- 4 cups all-purpose flour, plus more for dusting
- ½ cup (1 stick) unsalted butter, softened
- 2 large eggs
- 1 teaspoon vanilla extract
- Green, purple, and gold sanding sugar, for decoration
- Optional: cream cheese filling
Instructions
- In a large bowl, combine warm milk, yeast, and sugar. Let stand for 5 minutes.
- Add salt, nutmeg, flour, butter, eggs, and vanilla. Mix until a dough forms.
- Knead the dough on a lightly floured surface for 5-7 minutes.
- Place dough in a greased bowl, cover, and let rise for 1 hour.
- Preheat oven to 350°F (175°C).
- Shape the dough into a ring.
- If using, fill with cream cheese filling.
- Bake for 25-30 minutes.
- Let cool, then decorate with icing and colored sugar.
Notes
- You can add a small plastic baby inside the cake before baking.
- Customize the filling to your preference.
- Prep Time: 30 min
- Cook Time: 30 min
- Category: Dessert
- Method: Baking
- Cuisine: American