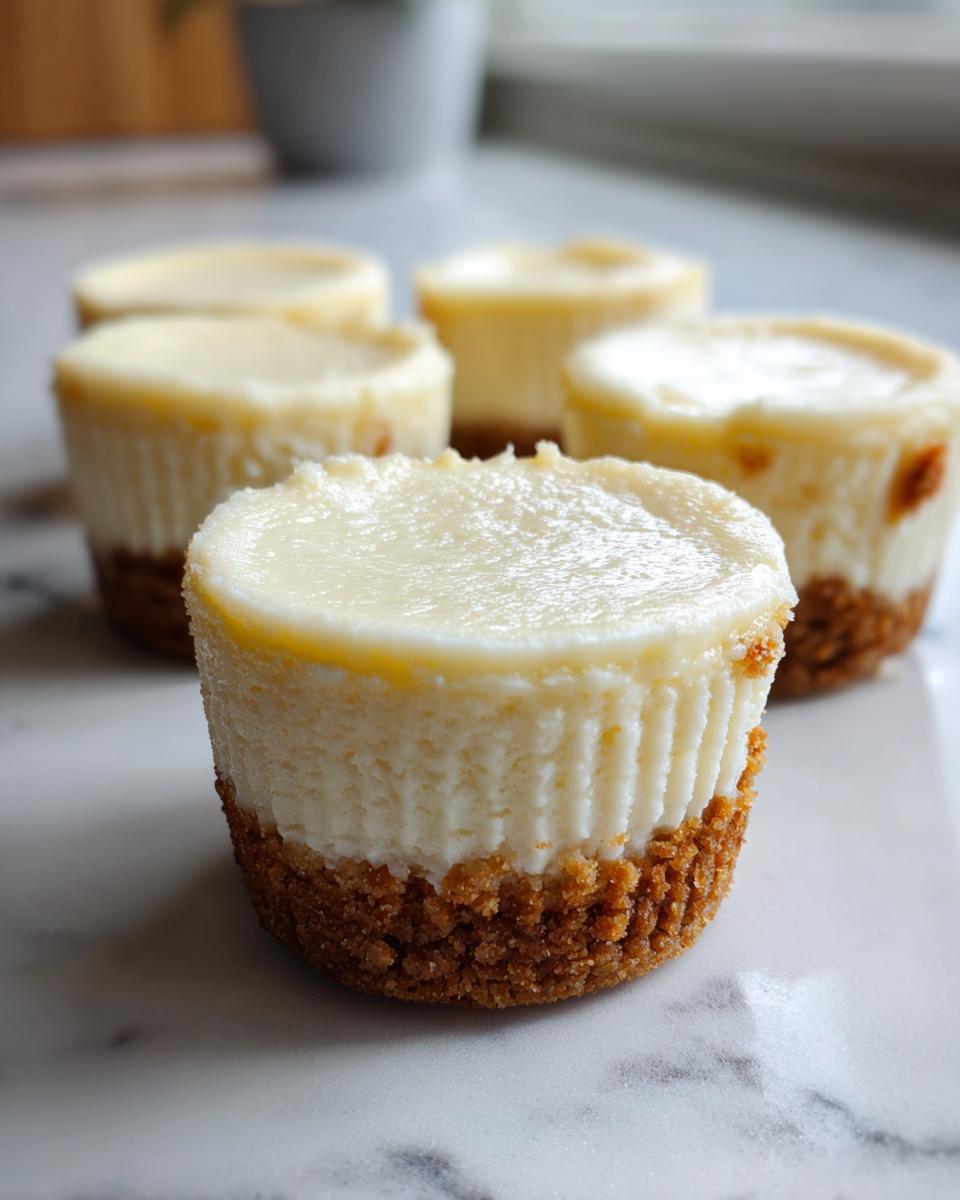
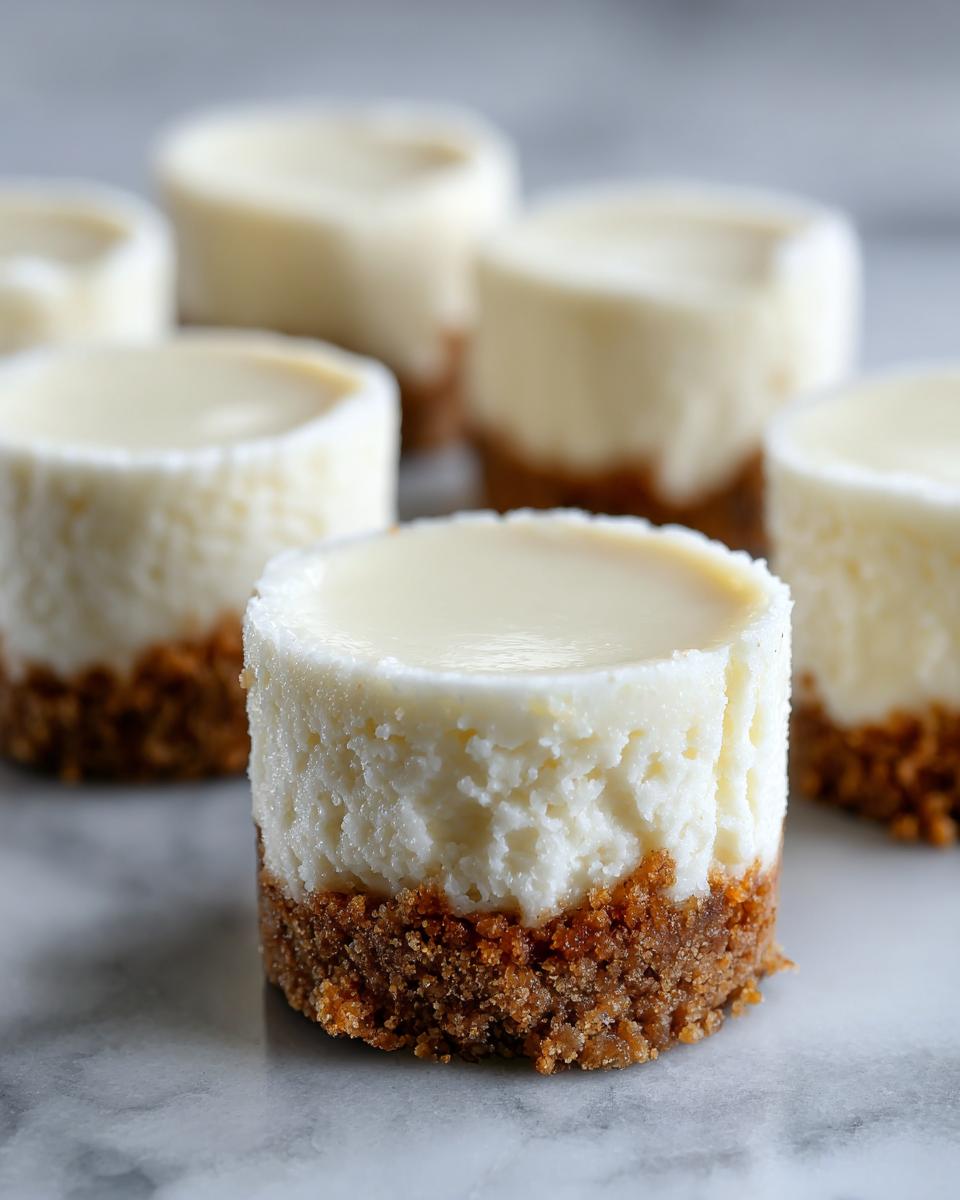
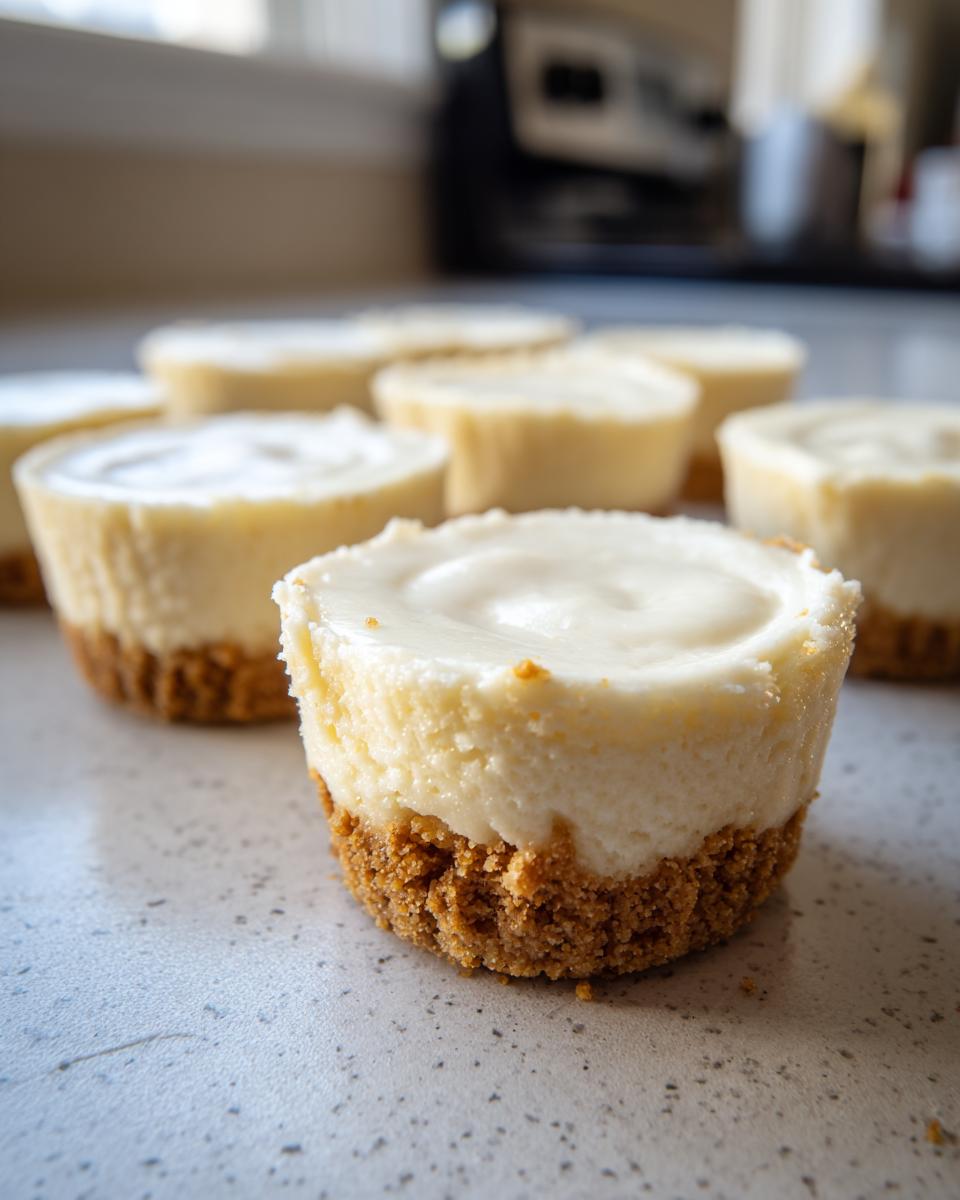
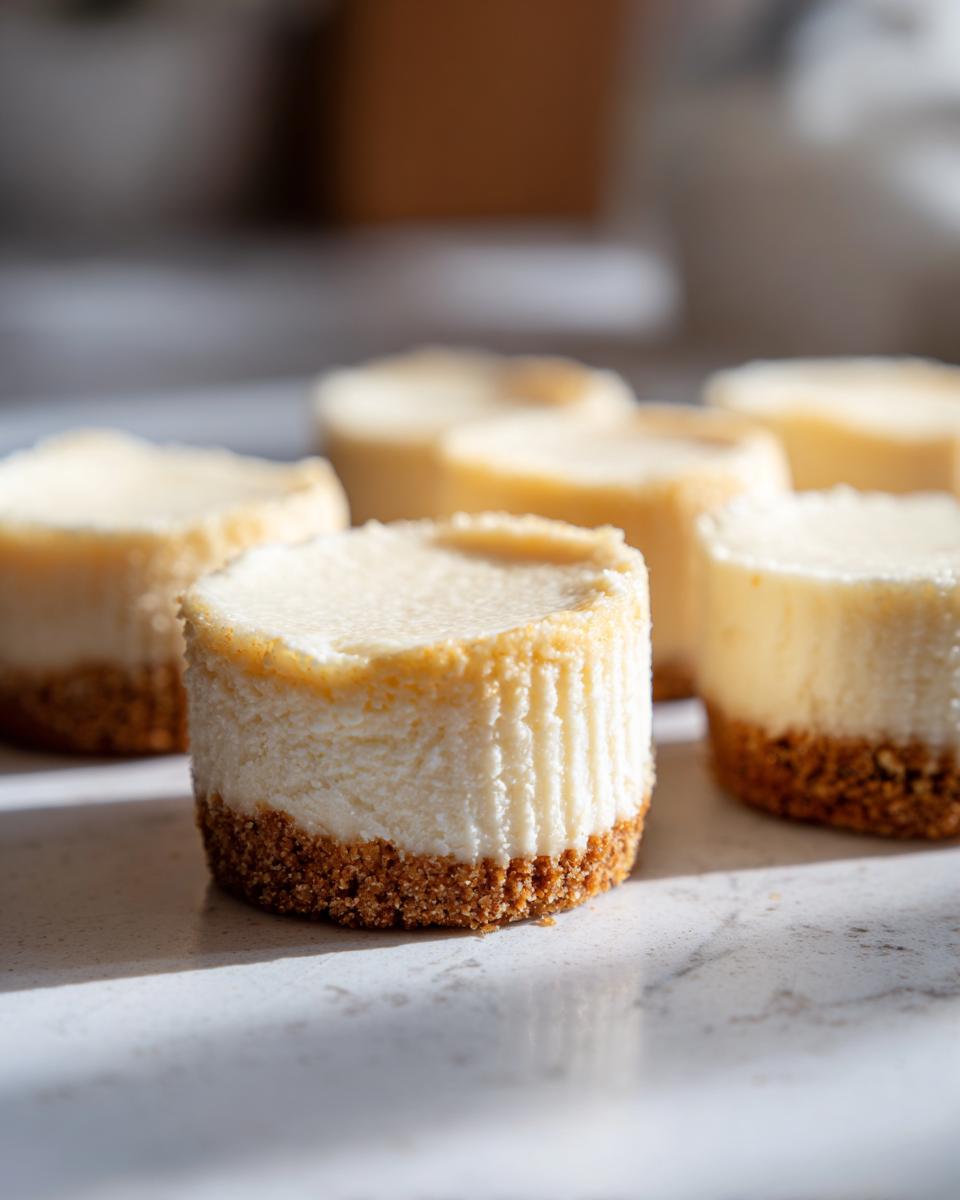
Okay, friends, let’s talk party desserts! You know those moments when you need something absolutely *delicious* but also, like, totally doable? That’s where my Mini Cheesecake Bites for the Perfect Party Dessert come in. I swear, I whipped these up for my cousin Sarah’s engagement party last year, and people were RAVING. They disappeared so fast, I barely got one myself! The best part? They look so fancy, but honestly, they are ridiculously EASY to make. It’s like my secret weapon for always bringing the most popular treat to any gathering. Trust me, if you’re looking for a go-to dessert that impresses everyone without stressing you out, you’ve landed in the right spot.
Why You’ll Love These Mini Cheesecake Bites for the Perfect Party Dessert
Seriously, these little bites are a party game-changer! Here’s why:
- So Easy! You won’t believe how simple they are to whip up. Perfect for when you’re short on time but want something special.
- Grab-and-Go Goodness: Being mini means no messy cutting! Guests can just pluck one (or two!) right off the platter.
- Crowd-Pleaser Guaranteed: Cheesecake is always a winner, and these mini versions are just adorable and irresistible.
- Endless Topping Fun: While delicious on their own, they’re a fantastic base for all sorts of yummy toppings.
Gather Your Ingredients for Mini Cheesecake Bites
Alright, let’s get down to business! To make these little pockets of joy, you won’t need anything too crazy. Just gather these goodies:
- 1 1/2 cups graham cracker crumbs (that’s about 10-12 full graham crackers, crushed up nice and fine!)
- 1/4 cup granulated sugar (for that sweet little crust)
- 6 tablespoons unsalted butter, melted (make sure it’s good quality butter; it makes a difference!)
- 2 (8 ounce) packages cream cheese, softened (this is key! Softened means it shouldn’t be cold; leave it on the counter for about an hour. Trust me, it makes mixing SO much smoother.)
- 2/3 cup granulated sugar (this is for the creamy filling)
- 2 large eggs (they help everything come together beautifully)
- 1 teaspoon vanilla extract (a splash of pure vanilla adds that classic cheesecake flavor we all love)
See? Nothing too scary! Having everything laid out before you start makes the whole process feel so much more relaxed, and honestly, way more fun.
Step-by-Step Guide to Making Mini Cheesecake Bites
Okay, now for the fun part – actually making these little wonders! It’s a pretty straightforward process, and once you get the hang of it, you’ll be whipping these up in no time. Remember, patience is key, especially with the cooling and chilling! Maybe check out my gooey Caramel Brownie Cheesecake for some inspiration while you wait, but these mini ones are way quicker for a party!
Preparing the Crust for Your Mini Cheesecake Bites
First things first, let’s get the crust ready. Grab a small bowl and mix together your graham cracker crumbs and that first bit of sugar. Then, pour in the melted butter and stir it all up until the crumbs are nicely moistened. It should look like wet sand. Now, take about a tablespoon of this mixture for each liner and press it down *really* well into the bottom of your mini muffin cups. I like to use the back of a small spoon or even the bottom of a shot glass to get it nice and compact. This makes sure you get a sturdy base for your yummy cheesecake filling!
Crafting the Creamy Cheesecake Filling
Time for the star of the show! In a medium bowl, beat your softened cream cheese and the rest of the sugar together until it’s super smooth and there are no lumps. Seriously, give it a good mix! Then, add your eggs, one at a time, beating just until each one is incorporated before adding the next. Don’t overmix here; we don’t want too much air in there. Finally, stir in that teaspoon of vanilla extract. Give it one last gentle stir to make sure everything is combined perfectly. You want this filling to be silky smooth!
Baking and Cooling Your Mini Cheesecake Bites
Now, spoon that luscious cream cheese mixture evenly over the crusts in your muffin liners. Fill them up, but maybe leave a tiny bit of space at the top as they can puff up just a smidge. Pop them into your preheated 325°F (160°C) oven for about 18 to 20 minutes. You’re looking for the edges to be set, but the center should still have a little wiggle, like Jell-O. That slight jiggle is exactly what you want! Once they’re done, leave them sitting in the muffin tin for about 10 minutes. This helps them settle down before you carefully transfer them to a wire rack to cool completely. Trust me on the cooling part – it’s super important!
Chilling for the Perfect Party Dessert Texture
This is probably the most important step for getting that amazing, smooth cheesecake texture everyone loves. Once they’re totally cool on the wire rack, it’s time for the fridge! You need to chill these mini cheesecakes for at least 2 hours. Honestly, I usually let mine go for 3 or 4 to be safe. This chilling period is what makes them firm up and develop that classic, creamy cheesecake bite. Don’t rush it, okay? The wait is totally worth it for that perfect party dessert result.
Tips for Perfect Mini Cheesecake Bites Every Time
Alright, let’s dive into some of my little secrets for making these mini cheesecake bites absolutely *perfect* every single time. I’ve learned a few things along the way, especially after making batches for countless parties (and maybe eating a few too many myself!). These aren’t super complicated, but they really do make a difference. Think of it like my tried-and-true advice, just like when I share my tips for the best Classic Chocolate Chip Cookies!
First off, make SURE your cream cheese is truly softened. I can’t stress this enough! If it’s too cold, you’ll end up with a lumpy filling, and nobody wants that. Leave it out on the counter for a good hour or so – it should feel soft and squishy, not cold. Another thing? Don’t overmix the filling once you add the eggs. Just beat until they’re *just* combined. Overmixing can lead to cracks, and while cracks don’t hurt the taste, we’re going for that polished look here!
For the crust, pressing it down firmly is key. A good, solid base prevents the filling from seeping through and gives you that satisfying bite when you enjoy it. And remember that slight jiggle in the center when they’re *almost* done baking? That’s your cue! They finish setting up as they cool, so pulling them out when the center is still just a *tiny* bit wobbly is exactly right. It ensures they stay perfectly moist and creamy.
Creative Variations for Your Mini Cheesecake Bites
Okay, so the basic recipe is AMAZING, right? But that’s just the starting point for these little guys. You can totally customize these mini cheesecake bites to fit any party theme or your personal craving. It’s like a blank canvas for deliciousness! I love seeing how people put their own spin on them, maybe inspired by my other cheesecake recipes like this Strawberry Shortcake Cheesecake or even the flavor combos in my Strawberry Cream Cheese Pound Cake!
First up, the crust! While graham crackers are classic, switch it up! Try using chocolate cookie crumbs (like Oreos, minus the filling) for a decadent chocolate-y base. Or, even a gingersnap crust for a little spice! Just use about the same amount and follow the same method.
Want to jazz up the filling? Easy peasy! Add a little lemon or lime zest to the cream cheese mixture for a bright, fresh tang. Or swap out the vanilla for a touch of almond extract or even a swirl of your favorite jam before filling the liners. The possibilities are endless, and they all lead to a delicious party dessert!
Serving and Storing Your Mini Cheesecake Bites
Okay, the hard part’s over – your adorable mini cheesecakes are baked, cooled, and chilled to perfection! Now for the fun part: serving them up to your delighted guests. They’re honestly fantastic just as they are, with that lovely creamy texture and graham cracker crunch. But, if you’re feeling fancy, or just want to add a little extra *oomph*, you can totally dress them up! A dollop of whipped cream (maybe my super easy Old Fashioned Pumpkin Pie Spiced Whipped Cream?) is always a winner. Fruit toppings look beautiful, like fresh berries or a drizzle of raspberry coulis. Chocolate sauce is pure indulgence, of course!
Got leftovers? Lucky you! Just pop them into an airtight container and keep them in the refrigerator. They’ll stay delightfully fresh and creamy for about 3 to 4 days. Honestly, they’re usually gone way before then, but it’s good to know!
Frequently Asked Questions About Mini Cheesecake Bites
Got questions? I totally get it! Making new recipes, especially for a party, can bring up a few head-scratchers. Here are some of the most common things people ask me about these fantastic Mini Cheesecake Bites. If you’re looking for more general dessert ideas, you can always check out my Dessert category!
Can I make these ahead of time?
Oh, absolutely! That’s one of the best things about them. You can totally make these a day or two in advance. In fact, they’re even better if they have a good long chill in the fridge! Just make sure to store them in an airtight container so they don’t dry out or absorb any fridge smells. Perfect for busy party hosts like us!
What’s the best way to prevent cracks?
Cracks can happen, but here’s the trick: don’t overmix the batter once you add the eggs, and don’t overbake! You want the edges to be set but the centers to still be a little jiggly. They finish baking and setting up as they cool. Also, make sure your cream cheese and eggs are at room temperature – that helps everything blend smoothly without needing too much mixing.
Can I use a different type of crust?
Yes, you can! The graham cracker crust is classic, but feel free to get creative. Chocolate cookie crumbs (like Oreos, minus the filling) are super popular and make for a really decadent bite. You could also try a gingersnap crust for a little spice, or even a vanilla wafer crust. Just make sure you press it down really well into the liners!
How long do these need to chill before serving?
The chilling time is super important for that perfect cheesecake texture! You’ll want to chill them in the refrigerator for **at least** 2 hours. Honestly, though, I usually aim for 3-4 hours, or even overnight, to make sure they’re perfectly set all the way through. Patience here pays off big time for the best texture!
Can I skip the paper liners?
You really shouldn’t! The paper liners help keep the cute mini cheesecake shape and make them super easy to remove from the muffin tin. Plus, they make for easy cleanup! If you’re really against liners, you could try greasing and flouring your mini muffin tin really well, but the liners are definitely the easiest way to go for perfect results every time. You can find all sorts of fun liners these days, too, which adds to the party vibe!
Estimated Nutritional Information
Now, let’s talk numbers! Keep in mind these are just estimates, and the exact values can wiggle around a bit depending on the brands you use and how generous you are with toppings. But generally, each of these little delights comes in at around:
- Calories: About 120
- Fat: Around 8g
- Protein: About 2g
- Carbohydrates: Roughly 12g
They’re pretty darn balanced for such a decadent treat!
Share Your Mini Cheesecake Creations!
I would absolutely LOVE to hear what you think if you try making these Mini Cheesecake Bites! Did you add a fun topping? Did they disappear as fast at your party as they do at mine? Please leave a comment below and let me know your thoughts! And if you snap any pics, I’d be thrilled if you shared them with me via my contact page or tagged me on social media. Your feedback and creations really make my day!
Print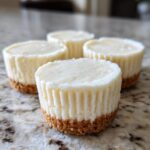
Mini Cheesecake Bites
- Total Time: 40 min
- Yield: 24 servings
- Diet: Vegetarian
Description
Easy and delicious mini cheesecakes perfect for parties.
Ingredients
- 1 1/2 cups graham cracker crumbs
- 1/4 cup granulated sugar
- 6 tablespoons unsalted butter, melted
- 2 (8 ounce) packages cream cheese, softened
- 2/3 cup granulated sugar
- 2 large eggs
- 1 teaspoon vanilla extract
Instructions
- Preheat your oven to 325°F (160°C). Line a mini muffin tin with paper liners.
- In a small bowl, combine graham cracker crumbs and 1/4 cup sugar. Stir in melted butter until crumbs are moistened. Press about 1 tablespoon of the mixture into the bottom of each mini muffin liner.
- In a medium bowl, beat cream cheese and 2/3 cup sugar until smooth. Beat in eggs one at a time, then stir in vanilla extract.
- Spoon the cream cheese mixture evenly over the graham cracker crusts in the muffin liners.
- Bake for 18-20 minutes, or until the edges are set and the centers are slightly jiggly.
- Let cool in the muffin tin for 10 minutes before transferring to a wire rack to cool completely.
- Chill in the refrigerator for at least 2 hours before serving.
Notes
- You can top these with fruit, chocolate sauce, or whipped cream.
- For a chocolate crust, use chocolate cookie crumbs instead of graham crackers.
- Prep Time: 20 min
- Cook Time: 20 min
- Category: Dessert
- Method: Baking
- Cuisine: American