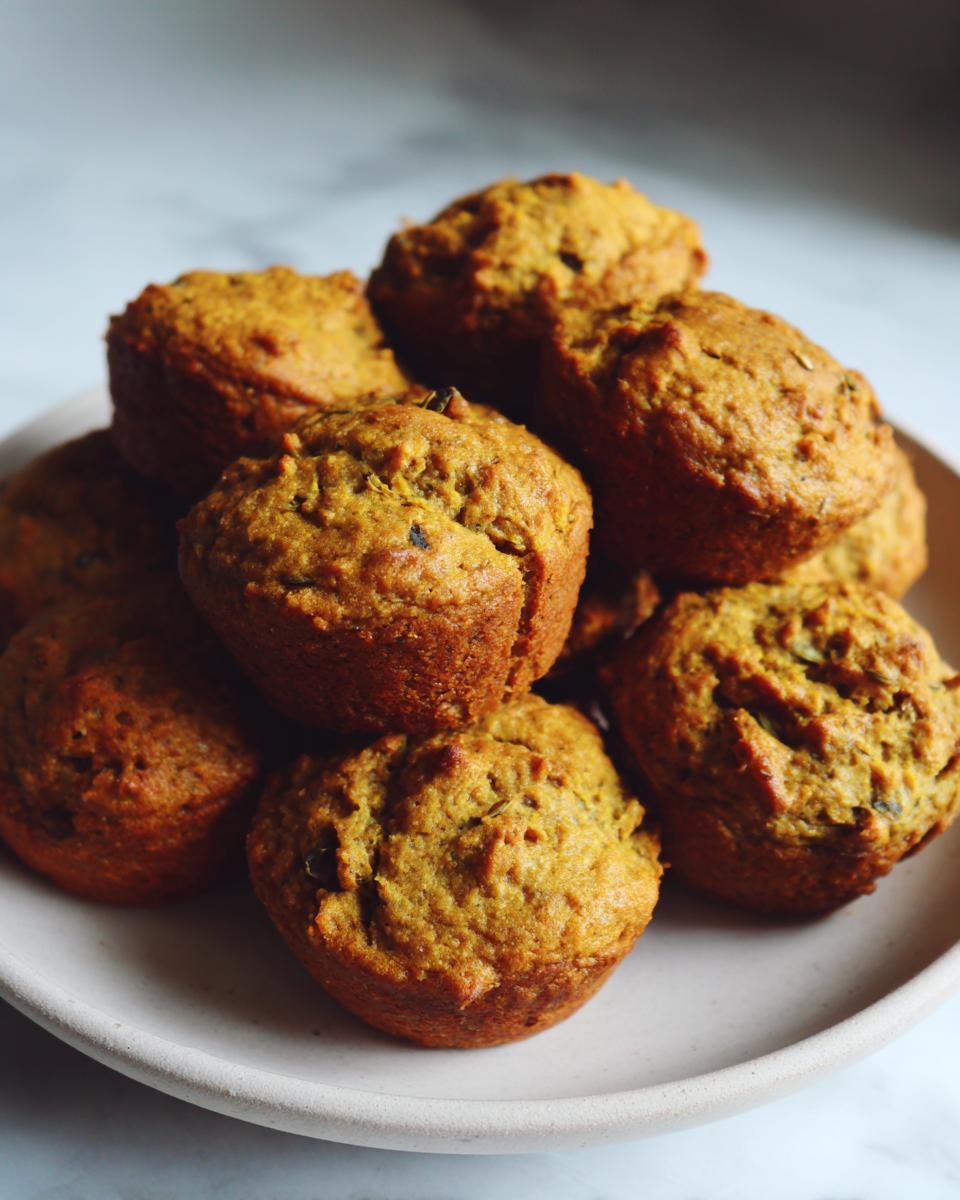
Okay, so let me tell you, if you’re anything like me, you absolutely *love* spoiling your furry best friend! And what’s better than seeing their tail wag a mile a minute? Giving them a delicious treat, of course! That’s why I’m beyond excited to share my secret weapon: these amazing Pumpkin and Banana Pup Cakes! They’re homemade, they’re healthy, and trust me, they’re utterly irresistible to dogs.
I started making homemade dog treats because I wanted to know *exactly* what was going into my pup, Buster’s, tummy. Honestly, those store-bought treats? Makes me a bit nervous! After tons of research on safe ingredients for dogs—and a *lot* of taste-testing (by Buster, of course!) —I perfected this recipe. And look, it’s not hard. It’s a lifesaver!
Why You’ll Love These Pumpkin and Banana Pup Cakes
Seriously, these pup cakes are a game-changer! Here’s why you and your furry friend will be obsessed:
- Super Easy to Whip Up: I’m talking minimal effort – even if you’re a kitchen klutz like me!
- Simple Ingredients: You probably already have most of the stuff in your pantry.
- Dog-Friendly Goodness: Everything is safe and healthy for your pup. (No scary ingredients here!)
- Better Than Store-Bought: You control the ingredients, so you know exactly what your dog is eating.
- Irresistible Taste & Texture: Dogs go absolutely bonkers for these! (Trust me, I’ve seen it!)
- Treat Yourself, Too: The satisfaction of making your dog a yummy, homemade treat? Priceless!
Ingredients for Delicious Pumpkin and Banana Pup Cakes
Alright, let’s talk ingredients! You won’t believe how easy these are. Here’s what you’ll need to make these amazing Pumpkin and Banana Pup Cakes:
- 1 cup of pumpkin puree. Make sure it’s the *pure* pumpkin, not the pie filling (trust me, I learned the hard way!).
- 1 ripe banana, totally mashed. The riper, the better for that yummy sweetness!
- 2 large eggs.
- 2 cups of whole wheat flour.
- 1 teaspoon of baking soda.
- ½ cup of peanut butter – AND THIS IS IMPORTANT: Make absolutely sure it’s xylitol-free peanut butter! We want safe treats for our buddies and xylitol is a big No-No.
Equipment You’ll Need
Okay, so you won’t need anything fancy for the Pumpkin and Banana Pup Cakes! I’m all about keeping things simple, and that includes the equipment. Here’s what you’ll want to have on hand:
- Mixing bowls (at least two!)
- Measuring cups and spoons (gotta get those amounts right!)
- A baking sheet
- Your trusty oven! (Make sure it’s clean-ish, at least. 😉)
And that’s it! See? Easy peasy!
Step-by-Step Instructions to Make Pumpkin and Banana Pup Cakes
Okay, friends, let’s get baking! These Pumpkin and Banana Pup Cakes are seriously a breeze, even if you’re a beginner baker (like me!). Follow these steps, and you’ll have your dog drooling in no time!
- Preheat That Oven: First things first, get that oven warmed up to 350°F (175°C). You know, get it nice and cozy in there while you get everything else ready.
- Wet Ingredients Unite!: In a big bowl, dump in your pumpkin puree, the mashed banana (make sure it’s *well* mashed!), and those two large eggs. Whisk it all together until it’s nice and blended.
- Dry Ingredients Party!: Grab a separate bowl (yep, more dishes, sorry!), and whisk together the whole wheat flour and baking soda. This helps everything mix evenly, you know?
- Combine the Crews: Now, slowly add the dry ingredients to the wet ingredients. Mix it all up until you’ve got a batter that’s smooth-ish. Don’t worry if there are a few streaks of flour; it will all work out!
- Peanut Butter Swirl: This is the fun part! Add in your peanut butter (xylitol-free, remember!) and mix until it’s all incorporated. It should look like a thick, delicious batter. Yum!
- Scoop and Bake: Grab a baking sheet (I usually line it with parchment paper for easy cleanup, but it’s optional). Then, just drop spoonfuls of the batter onto the sheet. I use a cookie scoop, but you can just use a spoon!
- Bake Time!: Pop that baking sheet into the preheated oven and bake for about 15-20 minutes. Keep an eye on them! You want them to be golden brown around the edges.
- Cool Down is Crucial: Take those pup cakes out and let them cool *completely* on a wire rack before you give them to your pup. This is super important so they don’t burn their little tongues! Trust me, it’s worth the wait.
And that’s it! You’ve successfully made some Pumpkin and Banana Pup Cakes. High five! Now, let your dog enjoy them (responsibly, of course!).
Ingredient Notes and Substitutions for Pumpkin and Banana Pup Cakes
Okay, let’s talk about some of the main players in these super delicious Pumpkin and Banana Pup Cakes, and a few little tweaks you can make. It’s all about making sure our pups get the best – and stay safe!
First up, peanut butter. Listen up – xylitol is a BIG no-no for our furry friends. It’s in a lot of sugar-free stuff, so always, *always* double-check the label on your peanut butter. The stuff in my cabinet has just peanuts listed!
Now, about the flour. I like whole wheat because it’s a little healthier, but if your pup has any sensitivities, you can totally swap it out! Oat flour works great (just use the same amount!), or even a blend of different flours. It takes a couple of tries to get the ratios how you like, so have fun with that!
Tips for Success with Your Pumpkin and Banana Pup Cakes
Okay, so you want to make these Pumpkin and Banana Pup Cakes absolutely PERFECT? Don’t worry, I got you!
First off, watch that oven! Ovens can be weird, you know? It’s always a good idea to check your pup cakes a little early, maybe around the 15-minute mark. You want them to be golden brown around the edges, but not burnt to a crisp! You can even use a toothpick test – stick it in the middle and if it comes out clean, you’re good to go.
Also, don’t overmix the batter! A few lumps are totally fine. Overmixing can make the cakes tough, and we want soft, chewy, delicious pup cakes for our buddies! Oh, and the cooling step? *Super* important. Trust me on that one!
Make-Ahead and Freezer Tips for Pumpkin and Banana Pup Cakes
So, life gets hectic! I get it. The good news? You can totally make these Pumpkin and Banana Pup Cakes ahead of time, and freeze them for later. Yay for meal prepping for your pups!

Just let the pup cakes cool completely after baking, then pop them into an airtight container or freezer bag. They’ll be good in the freezer for up to 2 months which is amazing! To thaw, just take them out and let them sit at room temperature for a bit. My dogs don’t like them frozen solid, so I give them a few minutes to soften up.
Serving Suggestions and Storage for Pumpkin and Banana Pup Cakes
Okay, so now you’ve got these amazing Pumpkin and Banana Pup Cakes, and your pup is probably doing the happy dance already! So, how *do* you serve these little treats? Well, the sky’s the limit!
I love using them as rewards during training. You know, “Sit!” *Pup cake!* “Stay!” *Another pup cake!* Or, you know, just as a little “I love you” snack throughout the day. My dog Buster goes nuts for them any time I pull them out! You can break them into smaller pieces for training, too.
As for leftovers? Not usually a problem with my gang, haha! But, if you *do* end up with some (lucky you!), you can store them in an airtight container at room temperature for a few days, or in the fridge for up to a week. Honestly, they usually don’t last that long around here!
Nutritional Information for Pumpkin and Banana Pup Cakes
Alright, so I am not a nutritionist, and these things vary wildly depending on the brands of pumpkin and peanut butter you use. But here’s a quick heads up: the nutritional info below is just an estimate. Double-check all of the labels for the ingredients you use to have a little more information!
Print
Pumpkin and Banana Pup Cakes
- Total Time: 35 min
- Yield: 12 pup cakes
- Diet: Vegan
Description
Homemade dog treats with pumpkin and banana.
Ingredients
- 1 cup pumpkin puree
- 1 ripe banana, mashed
- 2 large eggs
- 2 cups whole wheat flour
- 1 teaspoon baking soda
- 1/2 cup peanut butter (xylitol-free)
Instructions
- Preheat your oven to 350°F (175°C).
- In a bowl, mix pumpkin puree, mashed banana, and eggs.
- In a separate bowl, whisk together flour and baking soda.
- Add the dry ingredients to the wet ingredients and mix.
- Stir in the peanut butter.
- Drop spoonfuls of the mixture onto a baking sheet.
- Bake for 15-20 minutes.
- Let the pup cakes cool completely before serving.
Notes
- Store leftover pup cakes in an airtight container in the refrigerator for up to a week.
- Make sure the peanut butter does not contain xylitol, which is toxic to dogs.
- Prep Time: 15 min
- Cook Time: 20 min
- Category: Dog Treats
- Method: Baking
- Cuisine: American