I’ll never forget the first time I made tuna & oat cat crunchies for my little furball, Whiskers. Store-bought treats were fine, but I wanted something healthier—something I knew was made with love and simple, wholesome ingredients. Turns out, Whiskers couldn’t get enough of them! These crunchy little bites are so easy to make, and they’re packed with the nutrition your cat needs. Plus, they’re way more affordable than those fancy bags at the pet store. Trust me, once you see how much your cat loves these, you’ll never go back to the processed stuff. Homemade truly is the way to go!
Why Your Cat Will Love These Tuna & Oat Cat Crunchies
Oh, where do I begin? These little treats are like catnip in snack form! First off, they’re packed with protein from the tuna—perfect for keeping your kitty’s muscles strong. The oats? They add just the right amount of fiber to help with digestion. And let me tell you, the smell alone will have your cat running to the kitchen! Plus, they’re so easy to whip up—no fancy ingredients, no complicated steps. Just pure, simple goodness that your furry friend will go crazy for. My Whiskers practically does backflips when he hears the treat jar open now!
Ingredients for Tuna & Oat Cat Crunchies
Let’s talk ingredients—simple, wholesome, and cat-approved. Here’s what you’ll need: 1 can tuna in water, drained (trust me, skip the oil-packed stuff), 1 cup oats (old-fashioned rolled oats work best), 1 large egg (it binds everything together beautifully), and 1 tablespoon olive oil (a little extra moisture goes a long way). That’s it! No weird additives, no preservatives—just pure, natural goodness your cat will love. I always double-check that my tuna is packed in water—oil can be a bit much for their tummies. Simple, right?
How to Make Tuna & Oat Cat Crunchies
Alright, let’s get to the fun part—making these irresistible treats! I promise, it’s so easy even my cat could do it (if he had thumbs, of course). Just follow these simple steps, and you’ll have a batch of crunchy goodness ready in no time. Your cat will be purring with gratitude!
Step 1: Preheat and Prepare
First things first—preheat your oven to 350°F (175°C). While it’s warming up, grab a baking sheet and line it with parchment paper or give it a quick spritz of non-stick spray. Trust me, you don’t want those little treats sticking—it’s heartbreaking to lose even one!
Step 2: Mix the Ingredients
Now, let’s mix! In a big bowl, toss in your drained tuna, oats, egg, and olive oil. Get in there with your hands (or a spoon if you’re squeamish) and mash it all together until it’s well combined. You’ll know it’s ready when it holds together like a sticky dough. Oh, and don’t be surprised if your cat starts circling your legs—that tuna smell is irresistible!

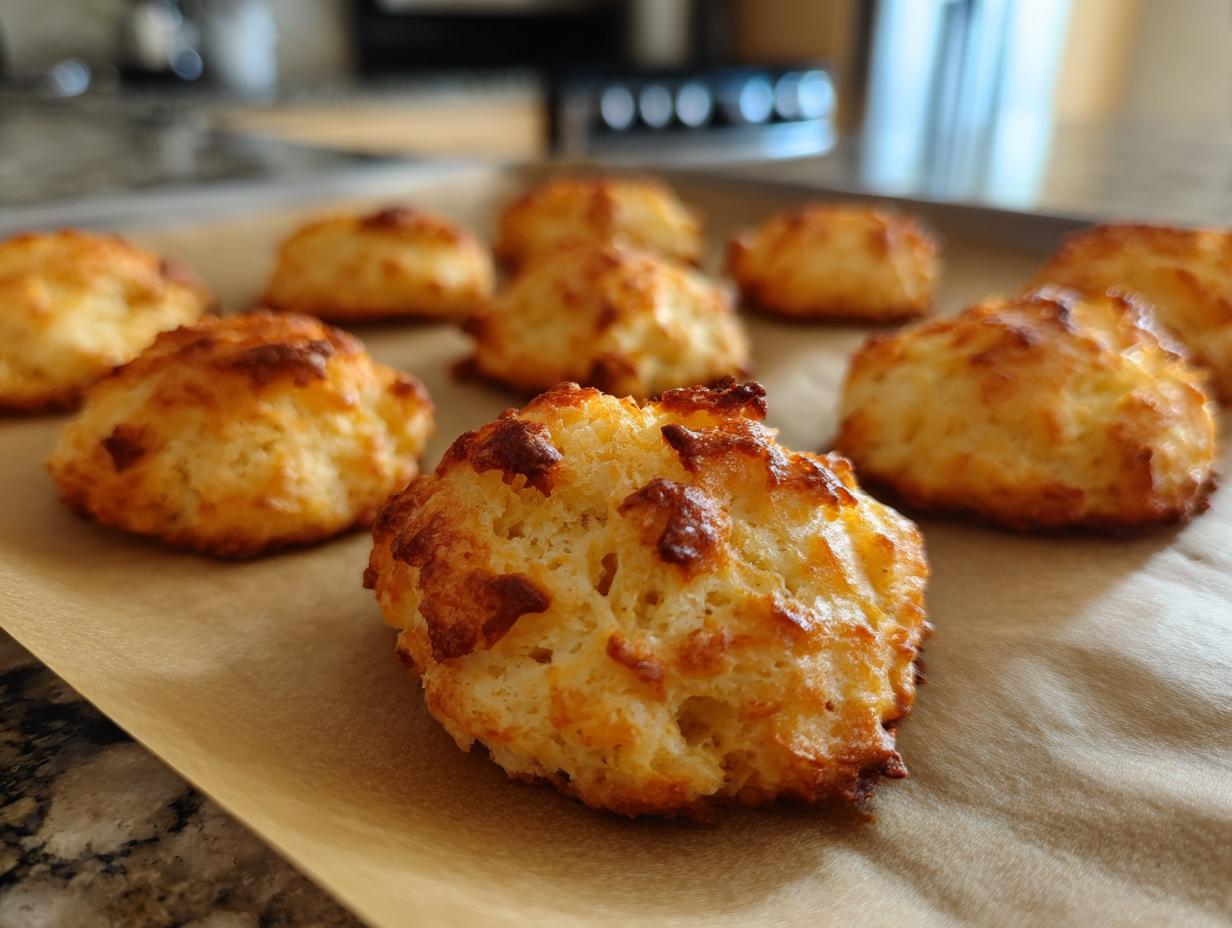
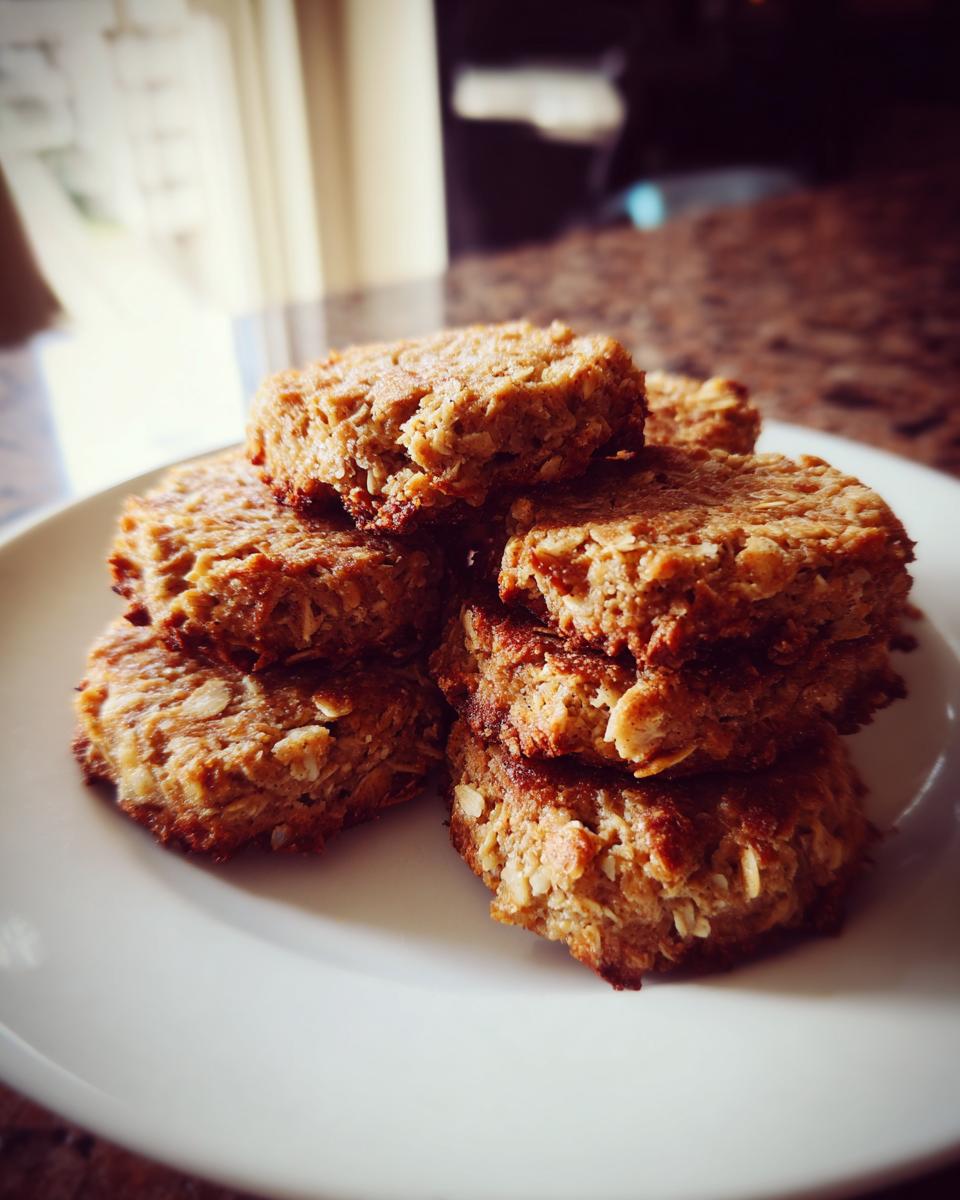
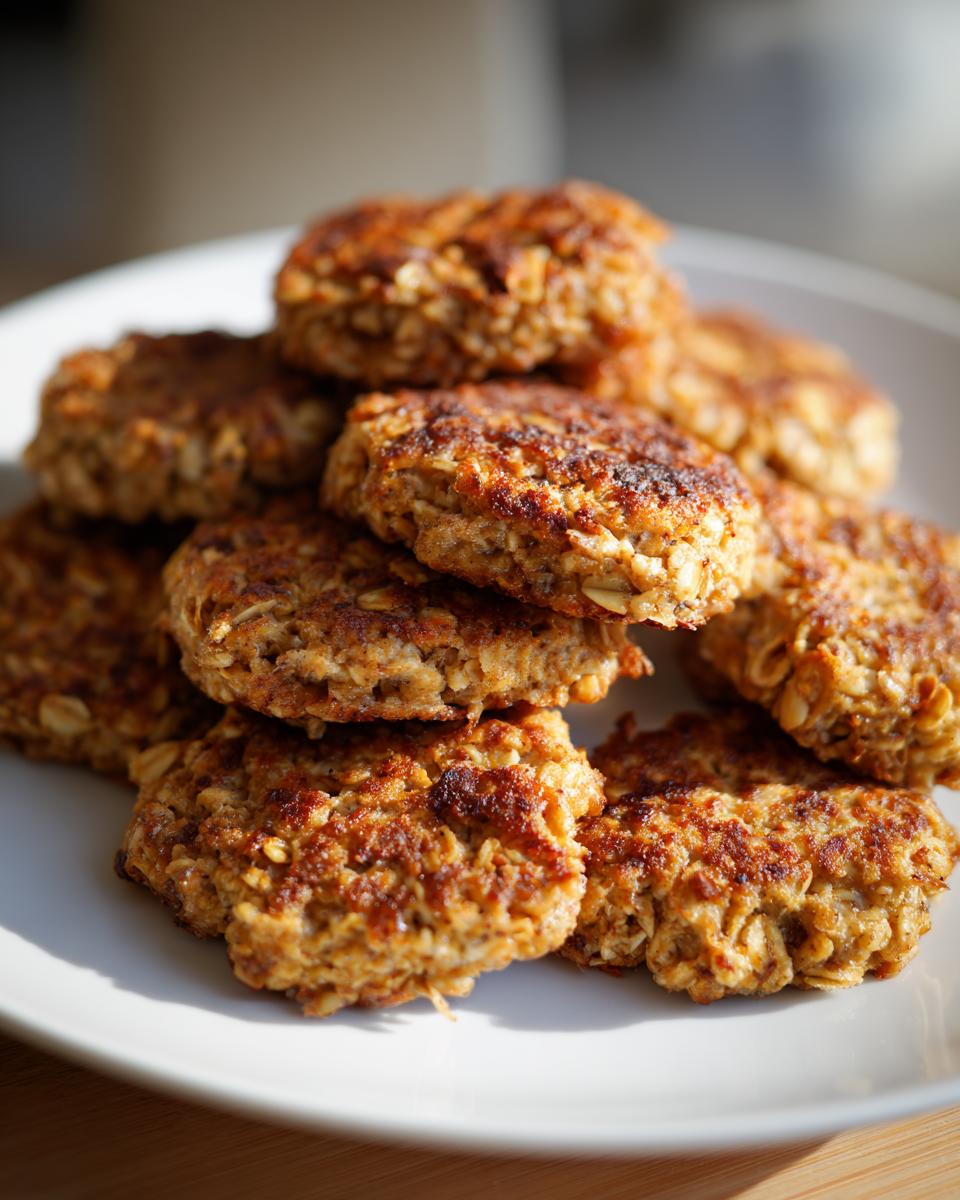
Step 3: Shape and Bake
Time to get creative! Roll the mixture into small balls—about the size of a pea or a little bigger, depending on your cat’s preference. Flatten them slightly with your fingers so they bake evenly. Pop them onto your prepared baking sheet, and into the oven they go for 15 minutes. Watch for that golden-brown color—it’s the perfect crunch indicator!
Step 4: Cool and Serve
Here’s the hardest part—waiting! Let the treats cool completely before serving. I know, your cat will be meowing impatiently, but trust me, hot treats are no fun for little tongues. Once they’re cool, watch your kitty’s eyes light up. Pure joy in every bite!

Tips for Perfect Tuna & Oat Cat Crunchies
Okay, let me share my secrets for getting these treats just right! First, adjust the size based on your cat’s preferences—smaller bites for dainty eaters, bigger ones for chunky cats. Don’t overcrowd the baking sheet; spacing the treats out ensures they bake evenly and get that perfect crunch. Oh, and let’s talk storage—keep them in an airtight container so they stay fresh! Trust me, these little tricks make all the difference. Your cat will be begging for more!
Storing and Serving Tuna & Oat Cat Crunchies
Now that you’ve made your Tuna & Oat Cat Crunchies, let’s make sure they stay fresh and perfect for your kitty! Pop them into an airtight container—trust me, it’s a game-changer! They’ll stay crunchy and delicious for up to a week. When it’s treat time, serve 1-2 at a time—these little bites are packed with flavor, so your cat won’t need much to feel pampered. Just watch their tail swish with joy! Remember, treats are best served as a reward, not a meal—so keep it balanced!
Nutritional Information for Tuna & Oat Cat Crunchies
Each one of these tasty treats is packed with goodness! Roughly, one Tuna & Oat Cat Crunchie has about 25 calories, 1g of fat, 2g of protein, and 2g of carbs. The tuna is the real MVP here—great for their muscles and energy. The oats add a bit of fiber to keep things moving smoothly. Just a heads-up, though: these numbers can vary a bit depending on the exact ingredients you use. So, while they’re a healthy snack, always keep an eye on your kitty’s overall diet—treats shouldn’t replace their regular meals!
FAQs About Tuna & Oat Cat Crunchies
Can I use tuna in oil instead of water?
Oh, I get this one a lot! While you could use tuna in oil, I don’t recommend it. Oil-packed tuna can be a bit heavy on your cat’s tummy—trust me, I learned that the messy way with Whiskers! Water-packed tuna keeps things light and digestible. Plus, it’s easier to mix into the dough. If you’re in a pinch, just drain the oil-packed tuna really well and pat it dry with a paper towel. But for the happiest cat (and easiest cleanup), stick with water!
Can I substitute the oats with something else?
Great question! The oats are there for texture and fiber, but if your cat’s sensitive to them, you can try finely ground oat flour or even a bit of cooked quinoa. Just avoid wheat flour—it’s harder for cats to digest. I once tried almond flour (big mistake!), and Whiskers turned up his nose like I’d insulted his ancestors. Stick with cat-friendly grains, and you’ll be golden!
How long do these treats last?
In our house? About two days because Whiskers goes nuts for them! But seriously, stored in an airtight container, they’ll stay fresh and crunchy for up to a week. If you want them to last longer, you can freeze them—just pop a few in a baggie and thaw as needed. Pro tip: If they start smelling “off” or get soft, toss ’em. Fresh is best when it comes to our furry friends!
My cat’s a picky eater—will they like these?
Oh, the picky eater struggle is real! But here’s the thing—the tuna smell is like cat magic. Even my friend’s ultra-finicky Persian, who turns her nose up at everything, goes wild for these. Start with one tiny piece as a test. If your cat snubs it (rare, but possible), try warming it slightly to boost the aroma. Still no luck? Maybe swap tuna for cooked chicken—same method, different protein. Every cat’s got their thing!
Can I make these treats bigger for training rewards?
Absolutely! For training sessions, I make slightly larger, flatter discs—easier to break into bits mid-session. Just adjust baking time: add 2-3 minutes for bigger treats, but watch closely so they don’t over-brown. My neighbor uses this trick for her agility cat, and it works like a charm. Remember, even big treats should be pea-sized for regular snacking—portion control keeps our kitties healthy and happy!
Print
Tuna & Oat Cat Crunchies
- Total Time: 25 min
- Yield: 20 treats
- Diet: Low Lactose
Description
Simple homemade cat treats with tuna and oats.
Ingredients
- 1 can tuna in water, drained
- 1 cup oats
- 1 egg
- 1 tbsp olive oil
Instructions
- Preheat your oven to 350°F (175°C).
- Mix the tuna, oats, egg, and olive oil in a bowl.
- Roll the mixture into small balls and flatten them slightly.
- Place on a baking sheet and bake for 15 minutes.
- Let cool before serving to your cat.
Notes
- Store in an airtight container for up to a week.
- Adjust the size based on your cat’s preference.
- Prep Time: 10 min
- Cook Time: 15 min
- Category: Pet Food
- Method: Baking
- Cuisine: N/A